
Delete Linked Clone Virtual Machines Manually
Hi all,
Today we will discuss about How to Delete Linked Clone Virtual Machines Manually. Few days back we had some issues on our production environment and we fixed that issue with deleting some linked clone virtual machines.
Horizon View 7.5 blog series: “Horizon View 7.5”
Previous blog post: “Recompose Linked Clone Desktop Pool”
Reference VMware KB article: 2015112, 2012377
Symptoms
There are multiple symptoms where we need to perform manual deletion of linked clone virtual machine.
I divided manual VM removal into four parts.
Remove the virtual machines from the ADAM Database
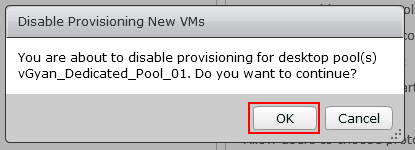
Before proceeding with manual virtual machine deletion, login to View Administrator console and disable provisioning.
Select targeted Desktop Pool > Summary > Click on Status > Select Disable Provisioning.
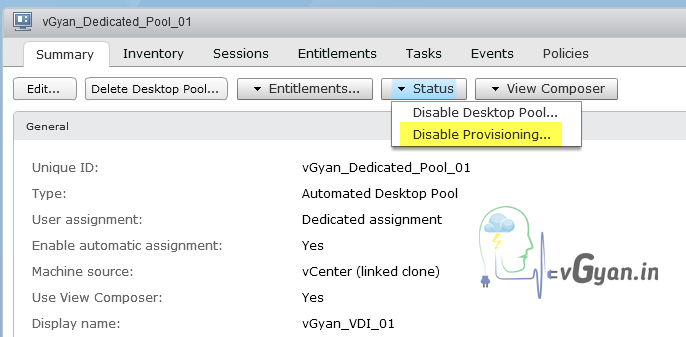
Click OK.
Backup ADAM database
Under Connection Servers > Select your connection server and hit on Backup now.

Click OK.
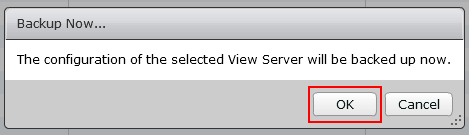
Verify you have successful backups for all your connection servers.

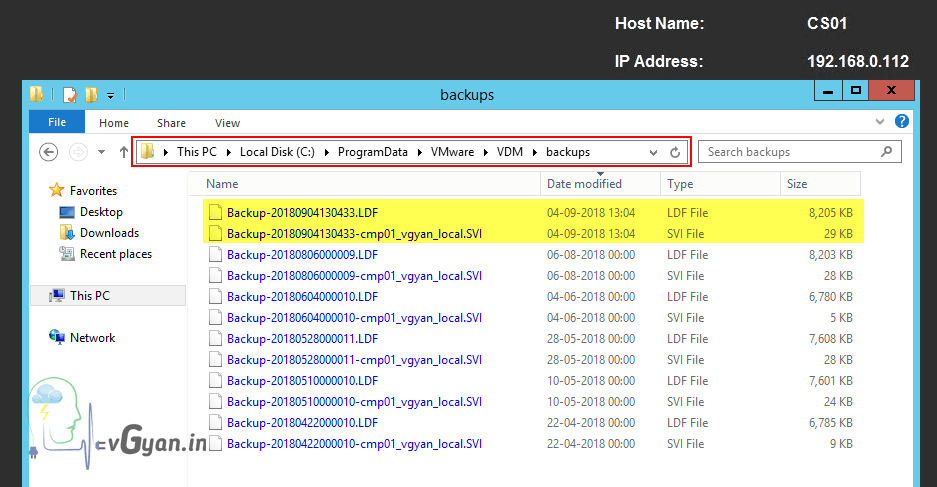
VDM backup repository will be in C:\ProgramData\VMware\VDM\backups folder.
ADAM backup will be on .LDF format and composer backup will be in .SVI format.
Verify recent backup entry.
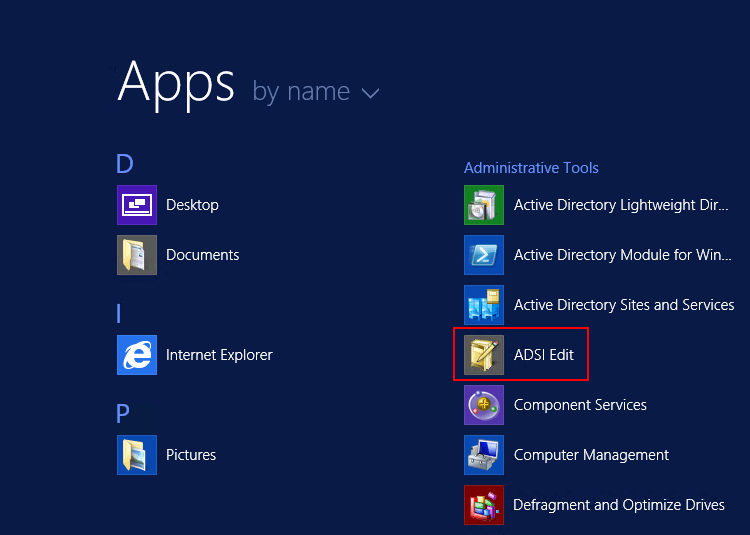
 Login to one of the View Connection Servers as Domain Administrator.
Click Start > Administrative Tools > ADSI Edit.
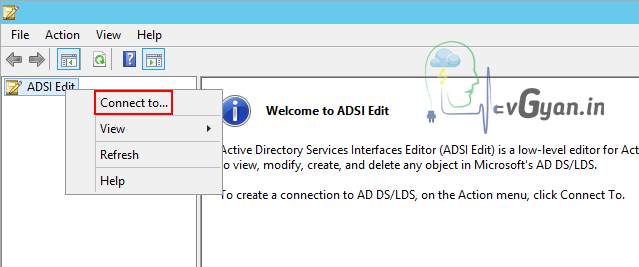
 In the console window, right-click ADSI Edit and click Connect to.
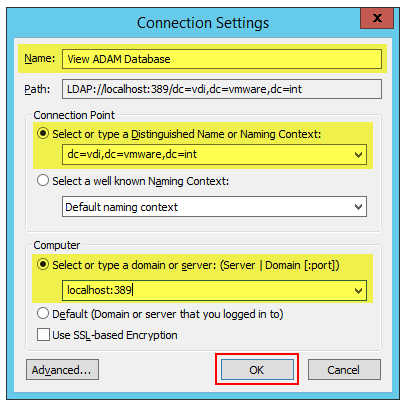
- In the Name field type: View ADAM Database
Select Select or type a Distinguished Name or Naming Context. - In the field below Select or type a Distinguished Name or Naming Context, type: dc=vdi,dc=vmware,dc=int
- Select Select or type a domain or server.
- In the field below Select or type a domain or server, type: localhost:389
Click OK.
 Right-click the Connection View ADAM Database [localhost:389], and click New > Query.

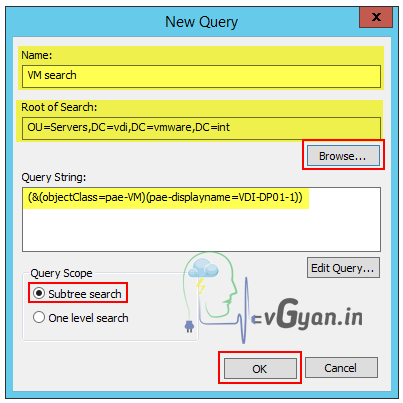
- Provide a query name such as VM Search.
- Under Root of Search, click Browse and select the Servers organizational unit.
- Click OK.
- In the Query String, paste this search string:
(&(objectClass=pae-VM)(pae-displayname=VirtualMachineName))WhereVirtualMachineNameis the name of the virtual machine for which you are trying to locate the GUID. - Click OK to create the query.
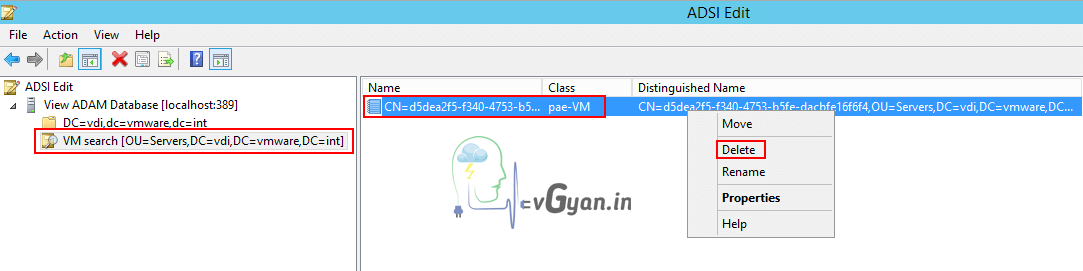
- Click the query in the left pane. The virtual machines that match the search are displayed in the right pane.
Check the properties of the items returned by the query to confirm the correct virtual machine were found, and delete the pae-VM object to remove them from the database.
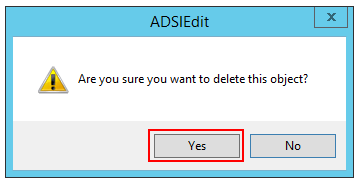
Click Yes.
Now we can see targeted virtual machine removed from view administrator console.
 Remove desktop references within the View Composer database
Before proceeding with View composer database, make sure you have taken database backup.
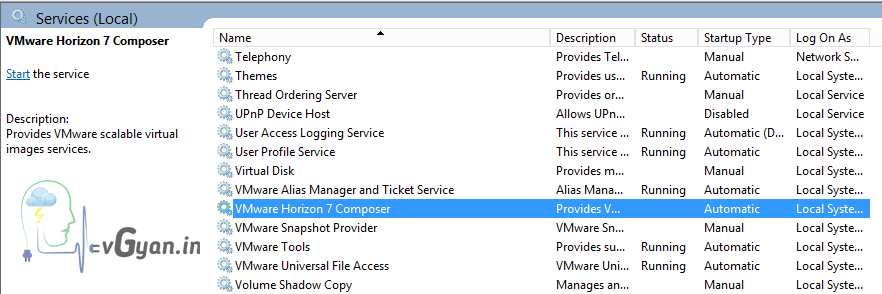
For taking Composer database backup, stop VMware Horizon 7 Composer service.
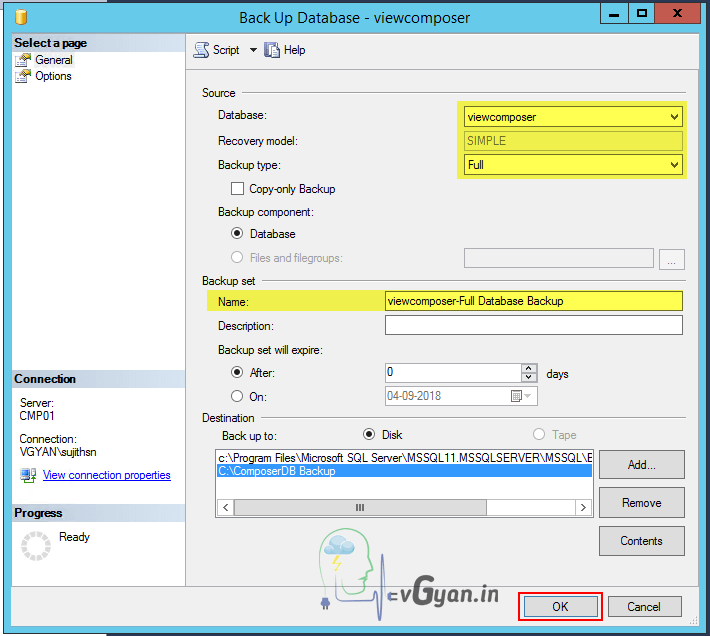
Open SQL Server management studio, right click on Composer database > Tasks > Backup.
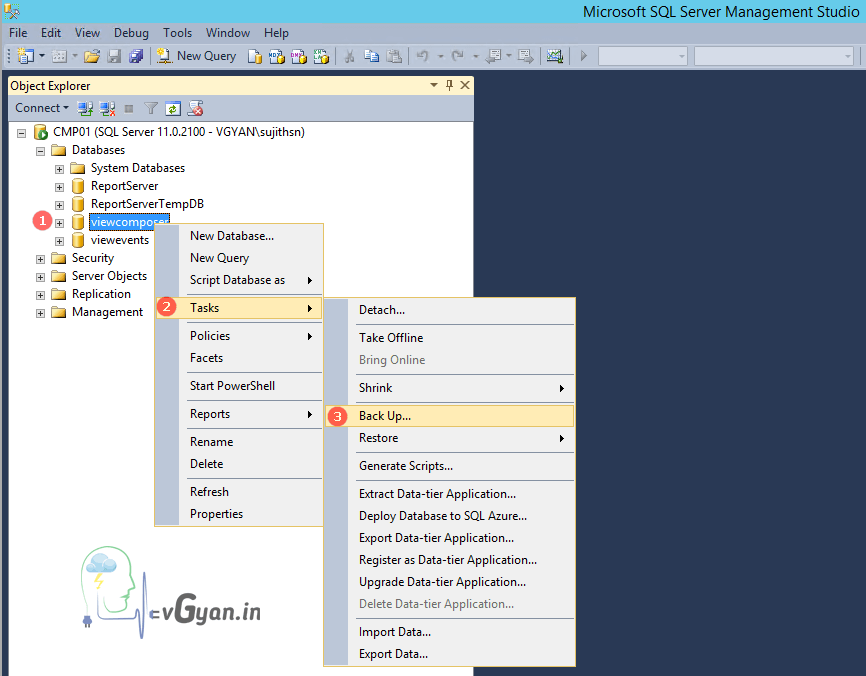
Select suitable location for saving DB backup.
Click OK.
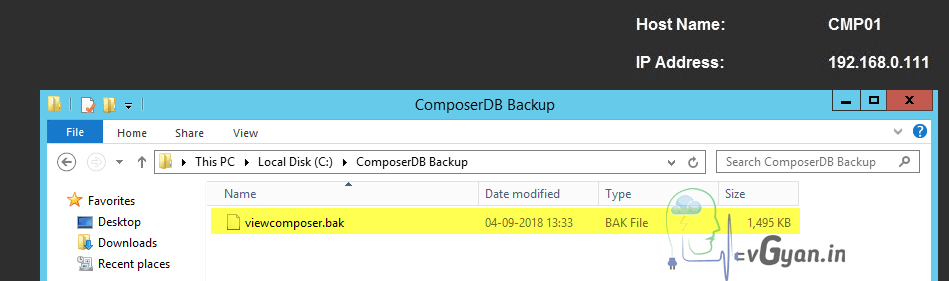
Verify Composer database.
For removing vm entry from composer database we are using Sviconfig RemoveSviClone command, and it will remove,
- linked clone database entries from the View Composer database.
- linked clone machine account from Active Directory.
- linked clone virtual machine from vCenter Server.
SviConfig is located on vCenter Server hosting View Composer (or standalone Composer server) at:
- 32-bit servers:
Install_drive\Program Files\VMware\VMware View Composer - 64-bit servers:
Install_drive\Program Files (x86)\VMware\VMware View Composer
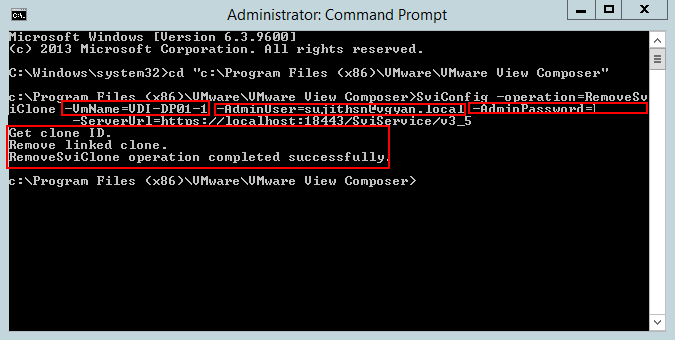
Before you remove the linked clone data, make sure that the View Composer service is running. On the View Composer machine, run the SviConfig RemoveSviClone command. The command looks similar to:SviConfig -operation=RemoveSviClone -VmName=VMname -AdminUser=TheLocalAdminUser -AdminPassword=TheLocalAdminPassword -ServerUrl=TheViewComposerServerURL
VMnameis the name of the virtual machine to remove.TheLocalAdminUseris the name of the user who is part of the local administrator group. The default value isAdministrator.TheLocalAdminPasswordis the password of the administrator used to connect to the View Composer server.TheViewComposerServerUrlis the View Composer server URL. VMware View Manager 6.0,TheViewComposerServerUrlis the View Composer server URL. The default value ishttps://localhost:18443/SviService/v3_5.
Open command prompt with administrator privilege and run viConfig RemoveSviClonecommand.
You can see output similar to,
- Get clone ID.
- Remove linked clone.
- RemoveSviClone operation completed successfully.
Close command prompt.
Removing the virtual machine from Active Directory
To remove the virtual machine from Active Directory:
- Log in to the Domain Controller as Administrator.
- Navigate to Start > Administrative Tools > Active Directory Users and Computers.
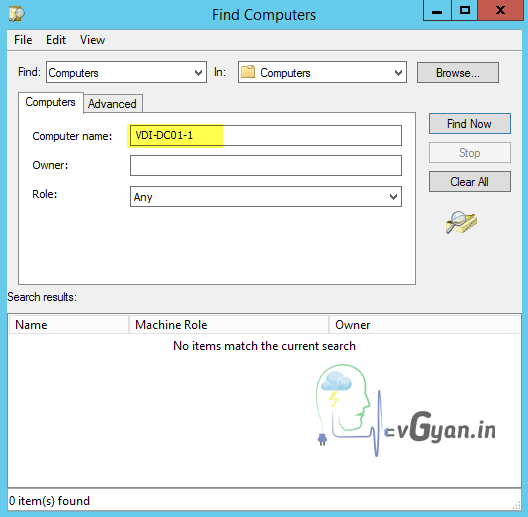
- Remove the virtual machine from Computers.Note: The virtual machine may not be in the Computers OU, It may be in a different OU.
Here its already removed from AD.
Deleting the virtual machine from vCenter Server
To delete the virtual machine from vCenter Server:
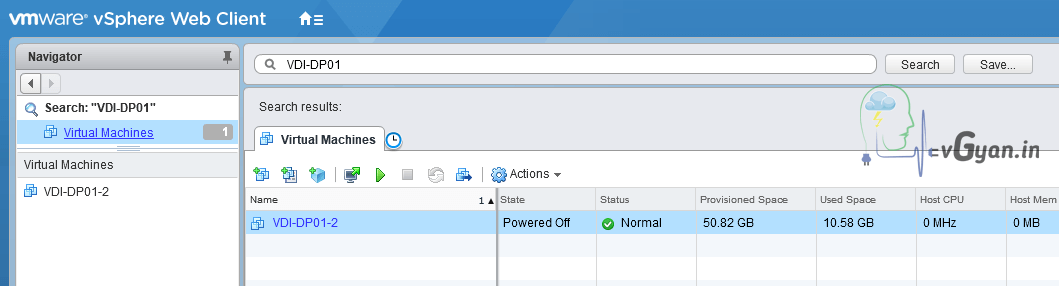
- Log in to vCenter Server using the vSphere Client.
- Right-click the linked clone virtual machine and click Power > Power Off.
- Right-click the linked clone virtual machine and click Delete from Disk.
Here VDI-DP01-1 vm already removed from vCenter server.
 Enable provisioning on desktop pool.
Select targeted Desktop Pool > Summary > Click on Status > Select Enable Provisioning.
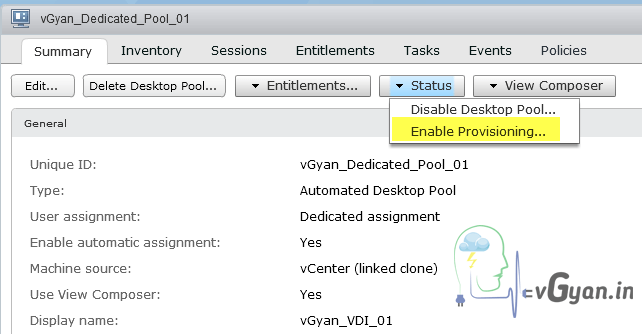
Click OK.

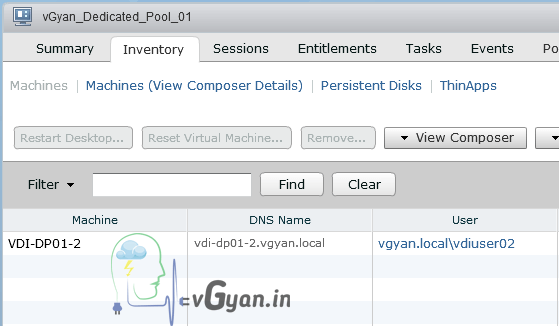
Wait for few minutes, View composer initiated new vm VDI-DP01-1 build and it become available in desktop pool inventory.

So we successfully removed linked clone virtual machine manually from Horizon environment.
Linked Clone Desktop Pool with Persistent Disk
If you are using linked clone for a dedicated pool which is having persistent disk, you should detach persistent disk before proceeding with this task. Once VM recreated on desktop pool you can re attach same persistent disk.
That’s all guys.. will discuss more on Horizon View 7.5 in upcoming post, Horizon View components installation and configuration, various Desktop pool creations, Application publishing etc… stay tuned.. 
Next blog post will be “Floating Desktop Pool with Instant Clone”
I hope you enjoyed reading this post. Feel free to share this to others if it is worth sharing!!!

