
Floating Desktop Pool with Instant Clone
Hi all,
Today we will discuss about How to Create Floating Desktop Pool with help of Instant clone Technology. Many organizations prefer floating desktop pool instead of providing dedicated desktop to end user. Floating user assignments can save underlined computing resource/effective solution for 24/7 operations etc..
Horizon View 7.5 blog series: “Horizon View 7.5”
Previous blog post: “Delete Linked Clone Virtual Machines Manually”
Let’s start with desktop pool creation..
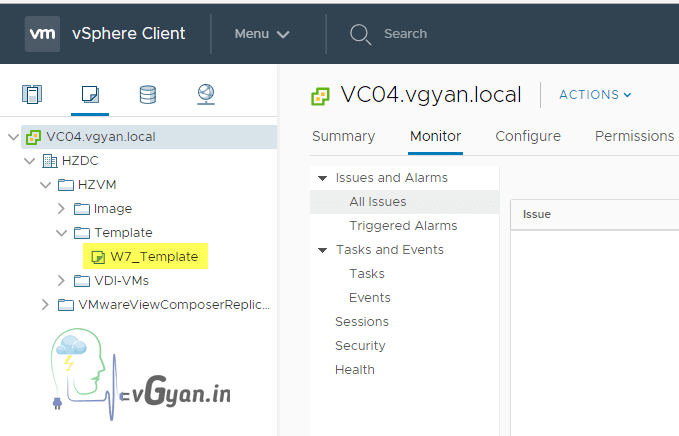
I have created Windows 7 Template on beginning of this blog series,
- Template: W7_Template
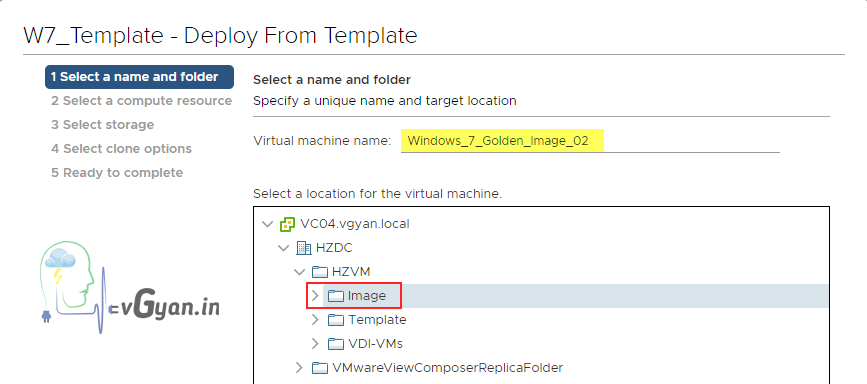
Create new Windows 7 Golden Image from existing Windows 7 template.
- Golden Image: Windows_7_Golden_Image_02
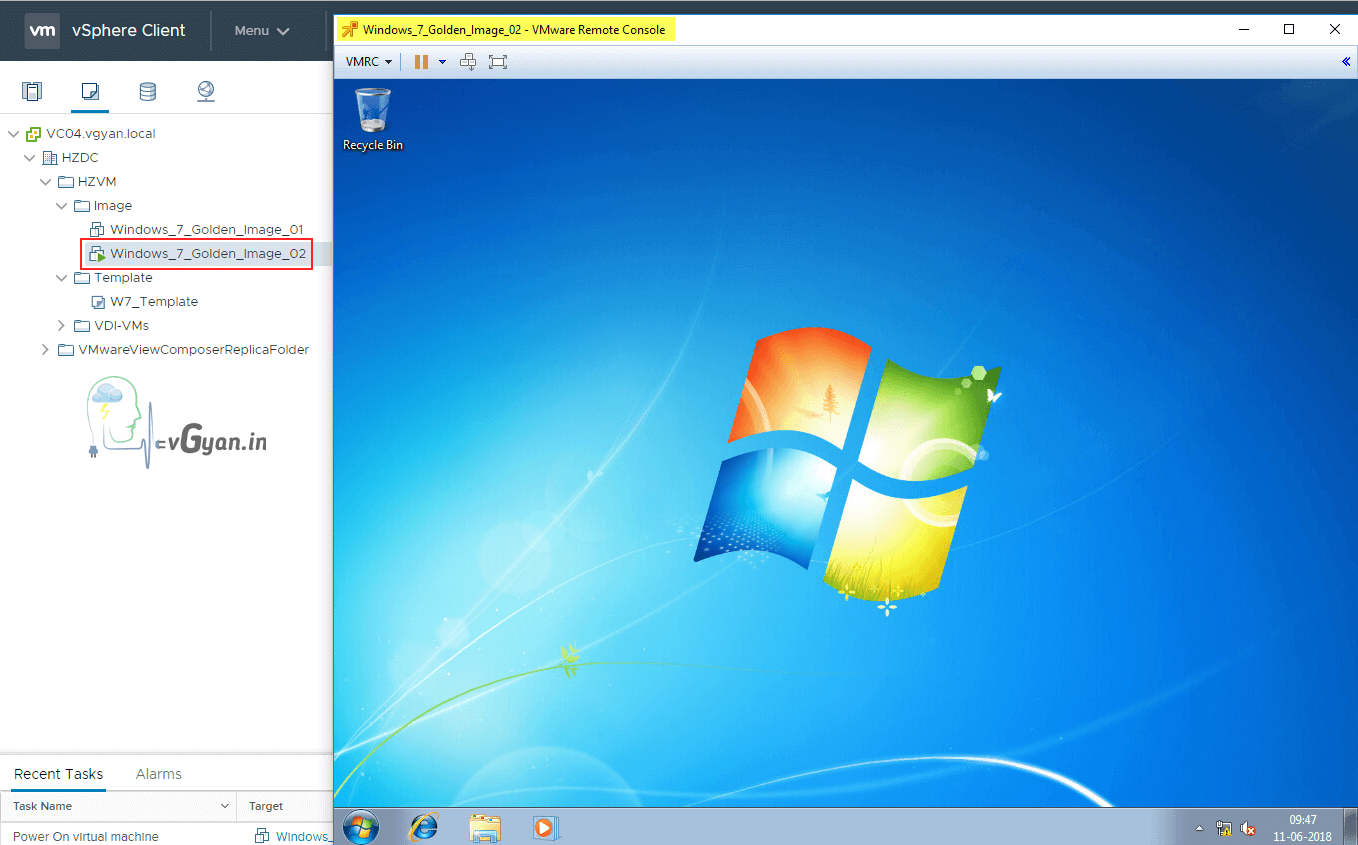
Windows 7 Golden Image 02 Virtual Machine is ready, lets proceed with VMware Horizon Agent installation.
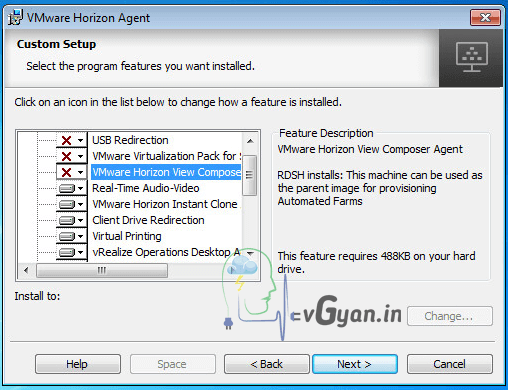
While installing VMware Horizon Agent, from custom setup select VMware Instant Clone.

From custom setup, disable VMware Horizon View Composer.
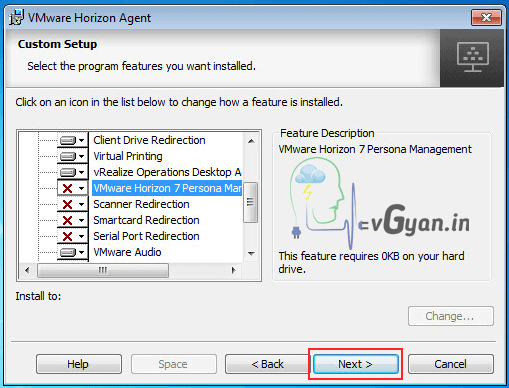
From custom setup, disable VMware Horizon 7 Persona Management.
Click Next and continue with Agent installation.
Once Golden Image is ready, take one snapshot “Snapshot_01”.
Note:- I installed google chrome on this golden/base image.
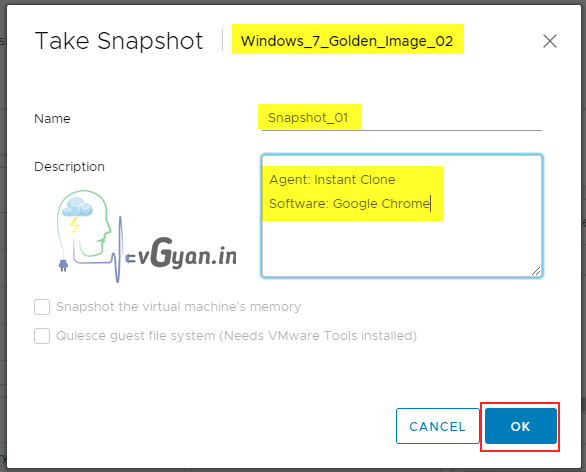
Verify Snapshot_01 from snapshot manager.

Instant Clone Domain Admins
Add one Instant Clone Admin Domain administrator, Instant clone domain admins should have below permissions.
- Create Computer Object
- Delete Computer Object
- Write All Properties
To add the account, from Inventory > View Configuration > Instant Clone Domain Admins > Add…
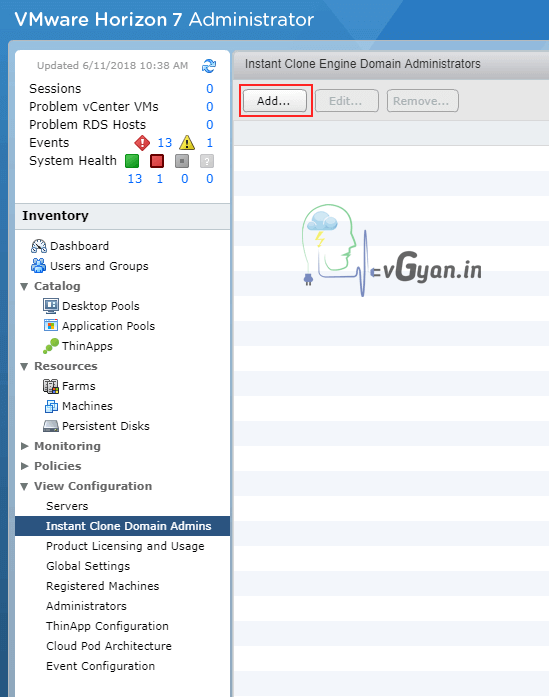
Provide Domain Admin details and click OK.

Create New Floating Desktop Pool
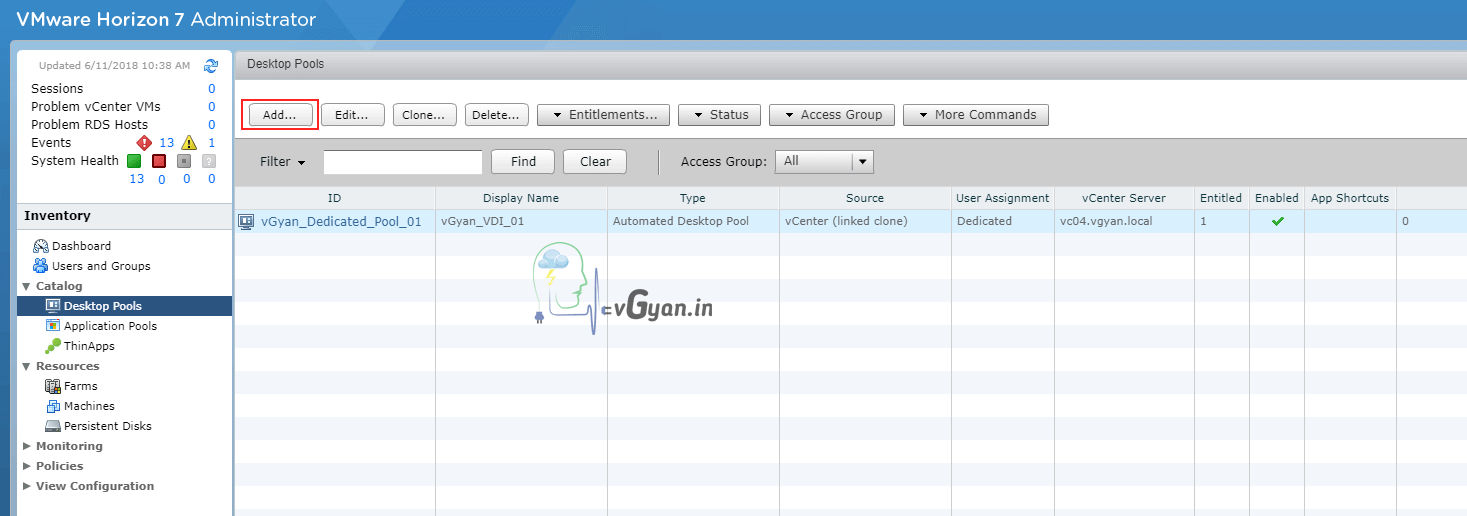
From administrator console, Under Inventory > Catalog > select Desktop Pools.
In Desktop Pools tab, click on Add.. button.
- Type
Basically we have three types of desktop pools:-
- Automated Desktop Pool
- Manual Desktop Pool
- RDS Desktop Pool
Today we going to discuss about Automated Desktop Pool with Instant Clone technology.
Select Automated Desktop Pool and click Next.

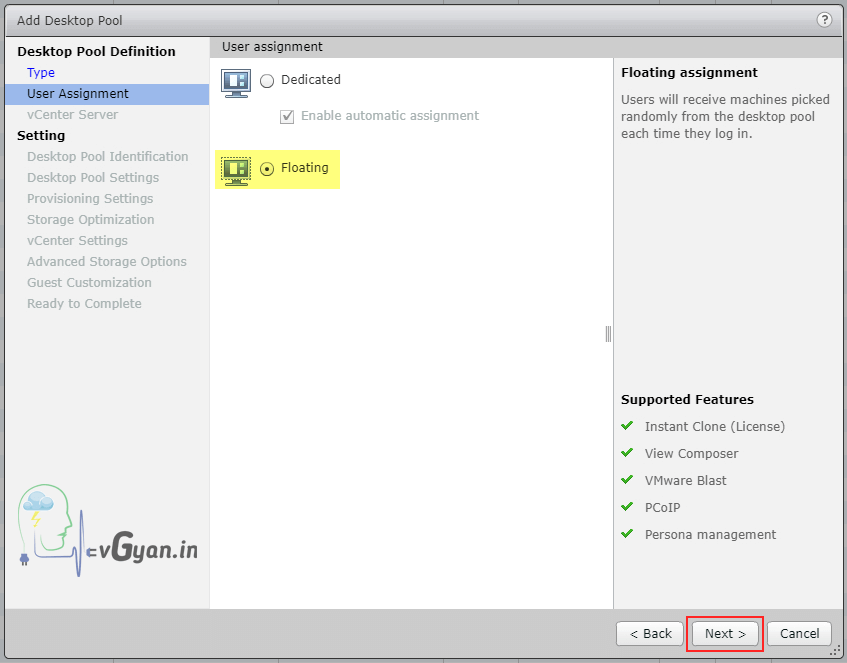
- User Assignments
There are two types of user assignments: –
- Dedicated
- Floating
As I mentioned earlier, we are going to deploy Floating desktop pool. So select Floating option.
Click Next.
- vCenter Server
In vCenter server tab, we have three cloning options:-
- Instant clone
- View Composer Linked Clone
- Full virtual machine
Select Instant Clone option and select targeted vCenter server and view composer which we already added to view environment.
Click Next.
Note:- I have added another vCnter server vc05.vgyan.local which is running on vSphere 6.0 U2 for instant clone creation.

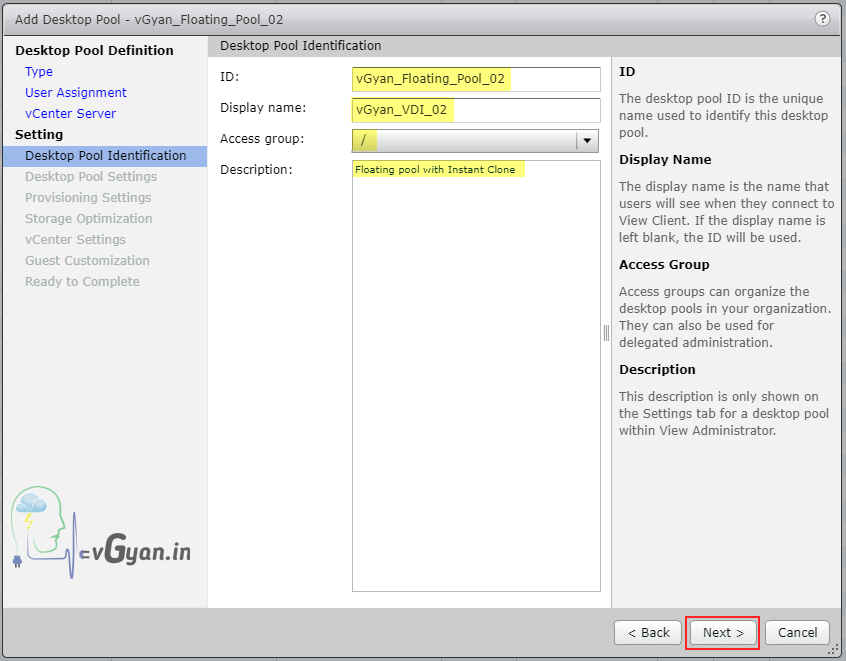
- Desktop Pool Identification
Now we have to setup/customize desktop pool.
Provide required inputs under Desktop Pool Identification tab,
- ID: vGyan_Floating_Pool_02 (Pool ID)
- Display Name: vGyan_VDI_02 (Visible to end user)
- Access Group: “/” ( we can create multiple access group according to requirement)
Click Next.
Desktop Pool Settings Under Desktop Pool Settings,
Under General,
- State: Enable
- Connection Server Restrictions: No
- Category Folder: No
Under Remote Settings,
- Automatic logoff after disconnect: After 120 Min
- Allow users to reset/restart their machines: No
- Allow user to initiate separate session from different client device: No
Under Remote Display Protocol,
- Default Display Protocol: VMware Blast
- Allow users to choose protocol: Yes
- 3D Renderer: Manage using vSphere Client
- HTML Access: Enabled
- Allow Session Collaboration: Enabled
Under Adobe Flash settings for sessions,
- Adobe Flash quality: Do not control
- Adobe Flash throttling: Disabled
Click Next.

- Provisioning Settings
Under Basic, select “Enable provisioning” and “Stop provisioning on error” options.
Provide Virtual Machine Naming pattern: “VDI-DP02-{n}”
Under Desktop Pool Sizing, provide required inputs according to your requirements.
- Max. number of machines: 1
- Number of spare (powered on) machines: 1
- Provisioning Timing: Provision all machines up-front.
Click Next.

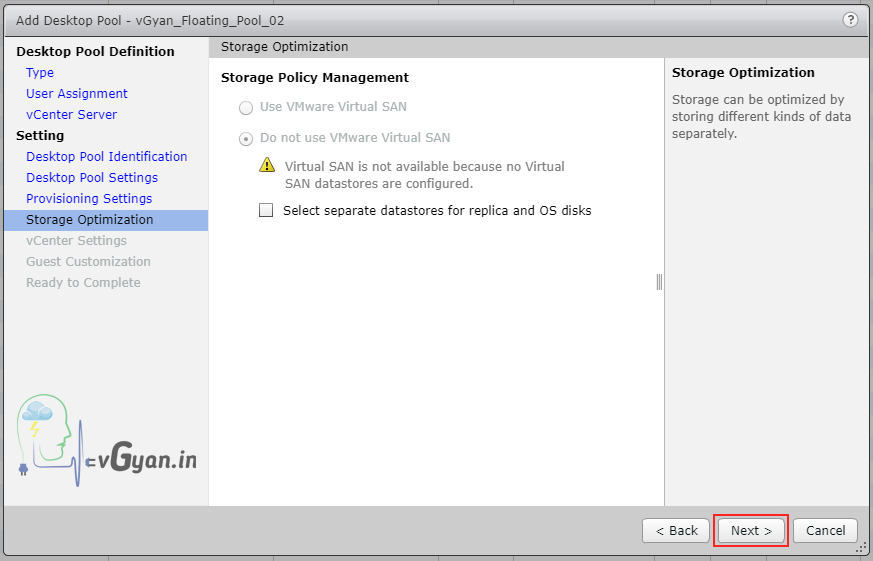
- Storage Optimization
I don’t have any Storage Policy Management settings, Click Next.
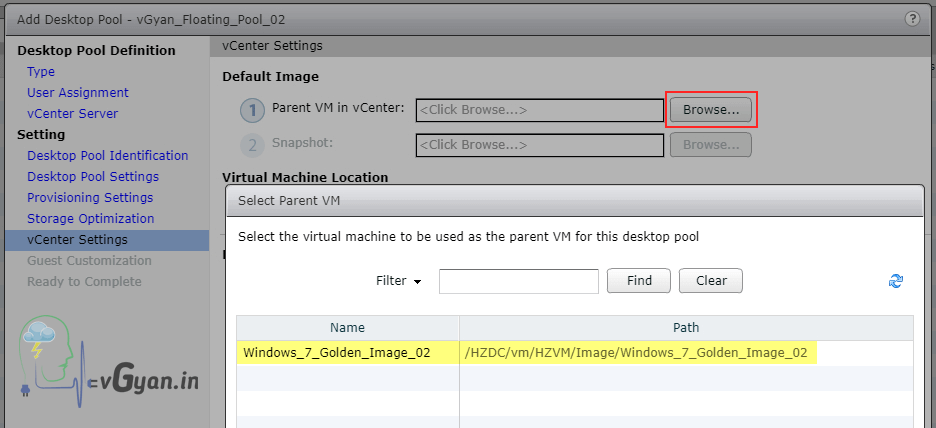
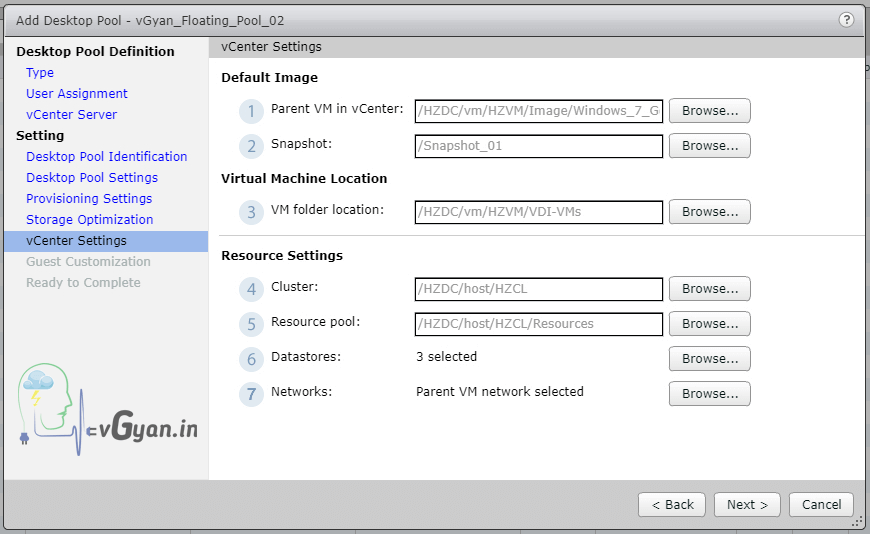
- vCenter Settings
In vCenter settings, we have to specify golden image, snapshot, VM folder, Resource details etc..
Select Parent VM from browse option, Select windows_7_Golden_Image_02 and click OK.
For creating windows 7 golden image, refer here.
Provide all the required inputs and click Next.
- Guest Customization
In the Domain box, from the drop-down menu, select the domain in which newly created virtual desktop machines will reside.
Then, in the AD container box, Browse in the container name of where the desktop accounts should be created.
- Domain: vgyan.local(sujithsn)
- AD container: OU: Horizon View Desktop
Select Use Quick Prep and click Next.
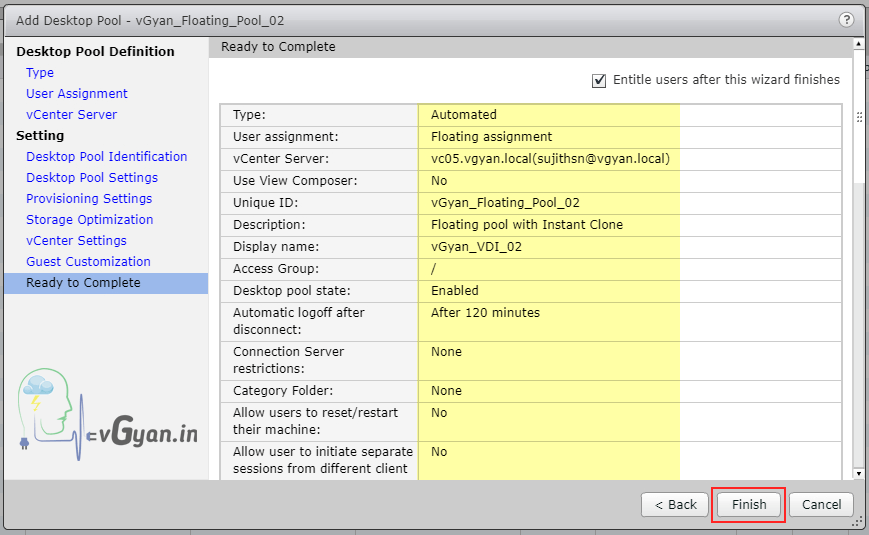
 Verify all the details and select “Entitle users after this wizard finishes”option.
Click Finish.
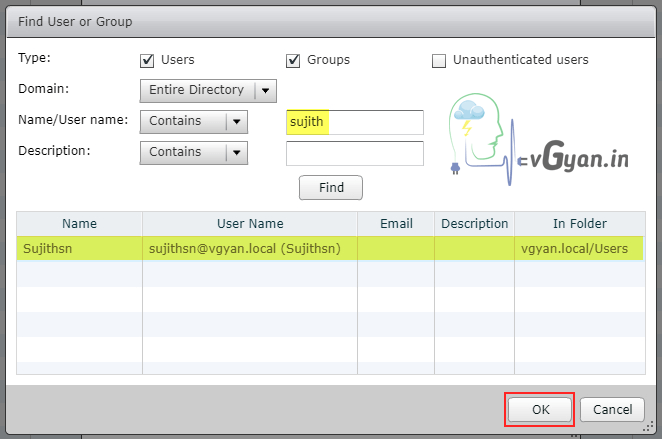
From User Entitlement pop-up, select required Users/Group and click OK.
Verify newly created desktop pool “vGyan_Floating_Pool_02” under desktop pool tab.
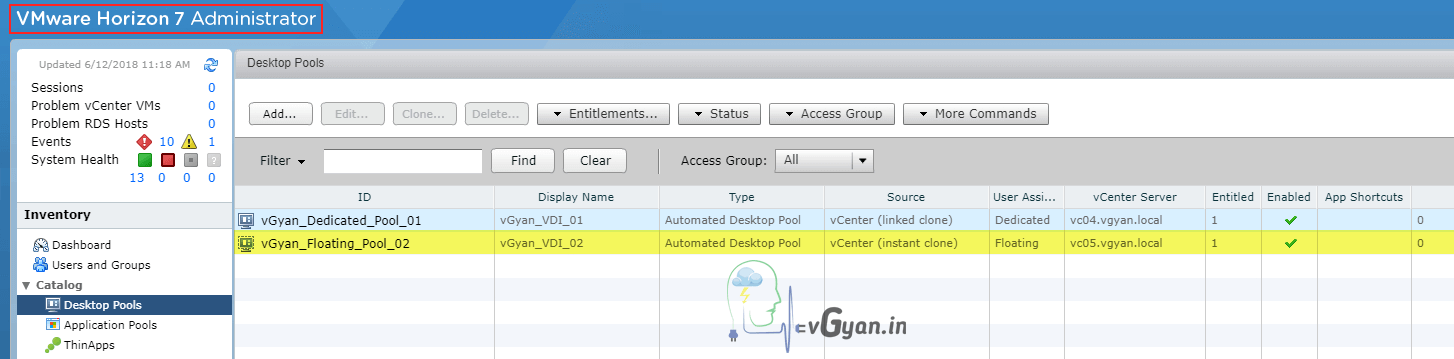
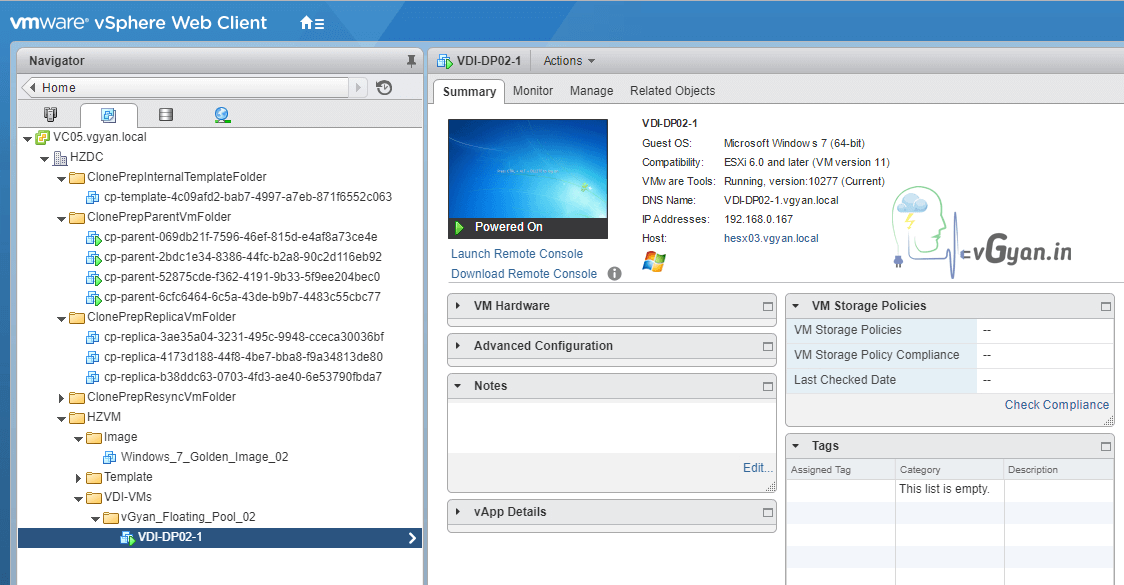
Below screenshot shows, VDI-DP02-1 Instant Clone virtual machine created successfully on vCenter.
Verify “VDI-DP02-1” desktop in desktop pool inventory and the desktop should be in available state.

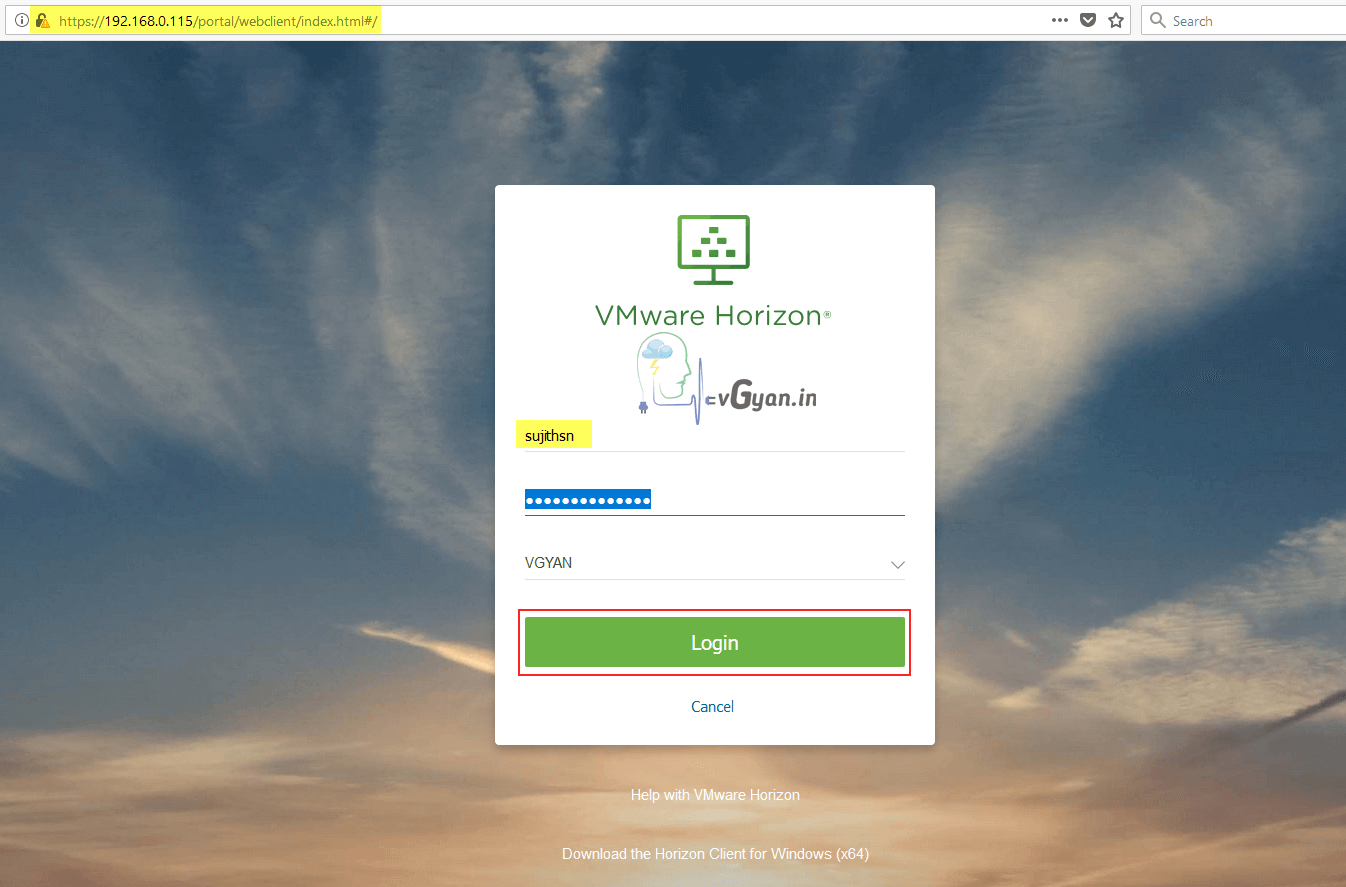
Let’s try to connect, open connection/security server URL/FQDN. I am using my security server for connecting.
Provide user name and password and hit on Login button.
Here you can see two available desktop machines, one is from dedicated pool and another one is recently created floating desktop pool.
Double click on “vGyan_VDI_02” floating desktop.
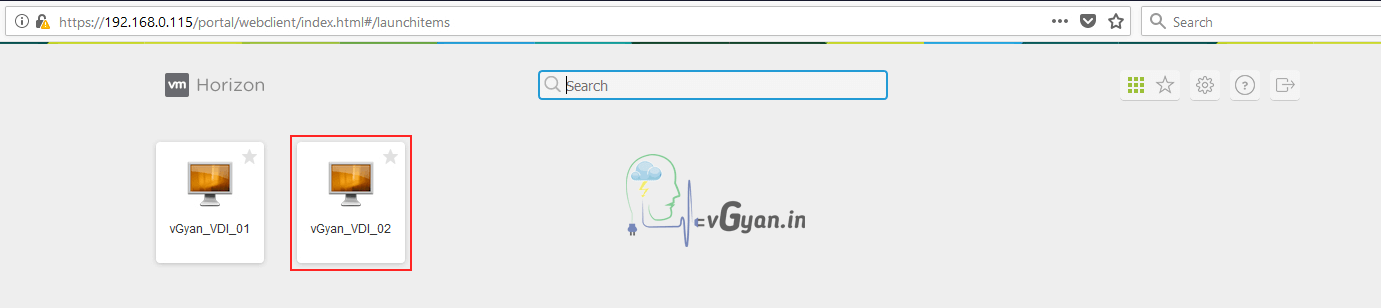
Now I am able to access newly created “VDI-DP02-1″ desktop through VMware Blast Protocol.

So we successfully deployed Automated Floating Desktop Pool with Instant Clone Technology.
That’s all guys.. will discuss more on Horizon View 7.5 in upcoming post, Horizon View components installation and configuration, various Desktop pool creations, Application publishing etc… stay tuned.. 
Next blog post will be “Push Image on Instant Clone Desktop Pool”
I hope you enjoyed reading this post. Feel free to share this to others if it is worth sharing!!!

