
Recompose Linked Clone Desktop Pool
Hi all,
Today we will discuss about How to perform recompense on Linked Clone desktop pool.
If you are working on end user computing platform, you will receive multiple requests for new software addition, software modification etc.. Here in Horizon View view having a cool technology called recompense with linked clone going to provide better solution for re-imagining.
Normally Recompense used for new software addition, re-imagining for crashed machines and some time for troubleshooting.
We will try to perform recompense on Linked-Clone desktop pool. Let’s start..
Horizon View 7.5 blog series: “Horizon View 7.5”
Previous blog post: “User Entitlements to Horizon View Desktop Pools”
In my previous blog post, we discussed about How to create dedicated desktop pool with Linked Clone technology. So we are going to perform Recompose on dedicated desktop pool. Dedicated desktop pool having persistent disk.
Below screenshot shows I have only Google Chrome shortcut available on my desktop.

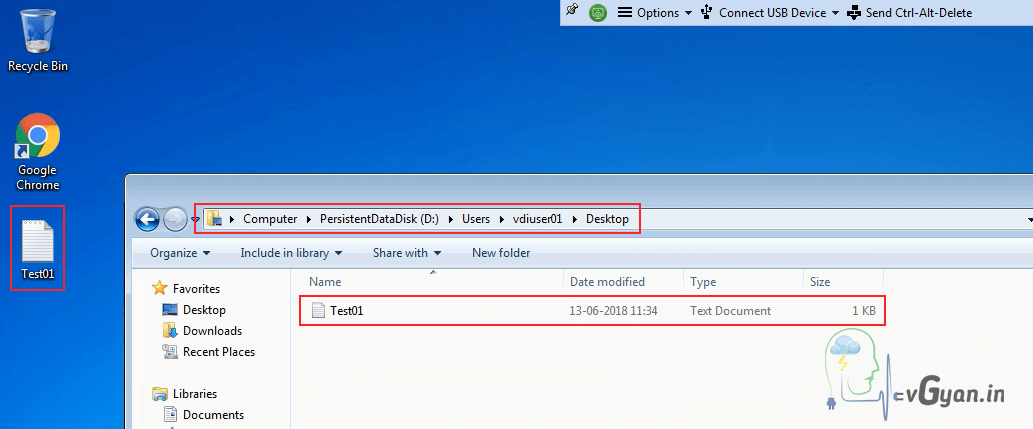
I am creating new text file called “Test01” and saving it on VDIUSER01 user desktop.
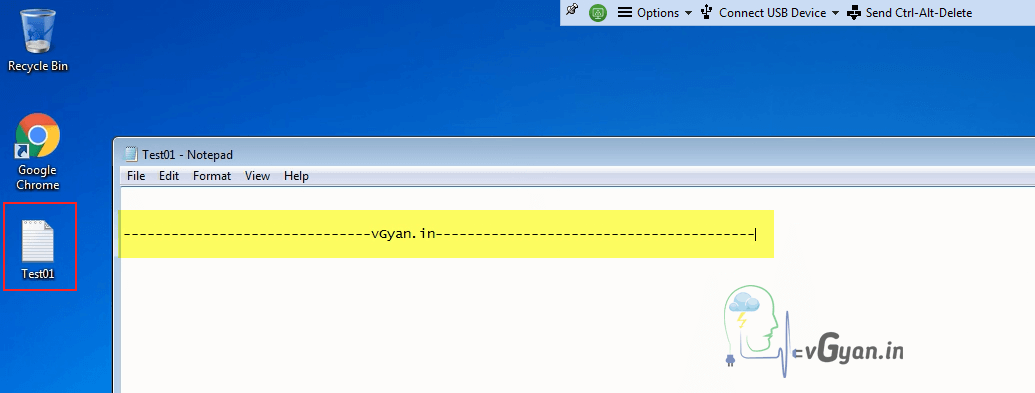
Verify newly created “Test01” file and location.
Under desktop pool summery, verify vCenter server customization.
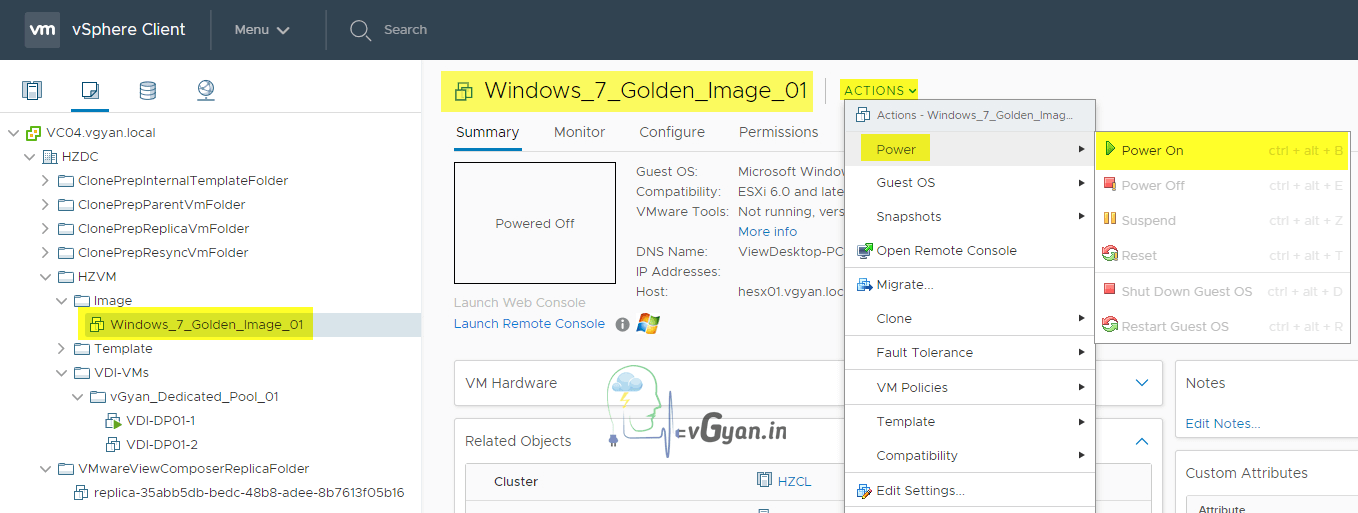
Parent VM: Windows_7_Golden_Image_01
Image: /Snapshot 01

Power ON Windows 7 Golden image which we created for Linked Clone desktop pool.
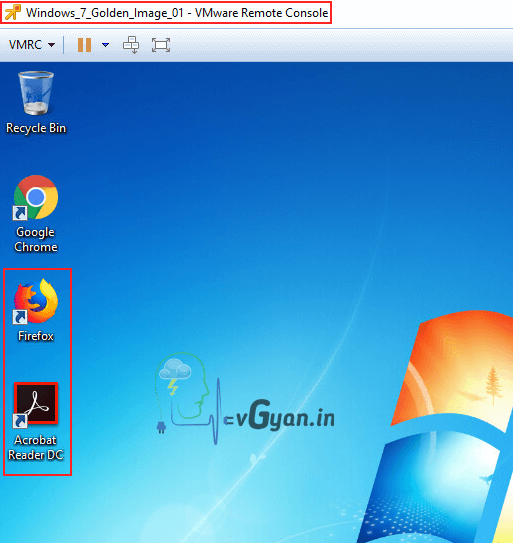
Open Windows_7_Golden_Image_01 console and verify we have only google chrome shortcut available on desktop.

I installed Mozilla Firefox and Adobe Reader DC software’s on Windows_7_Golden_Image_01.
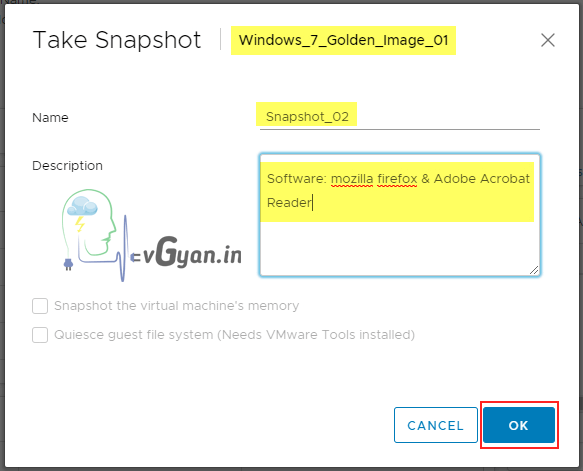
For recompense we have to take another snapshot. proceed with snapshot creation.
Name: Snapshot_02
Description: Software- Mozilla Firefox & Adobe Reader.
Click OK.
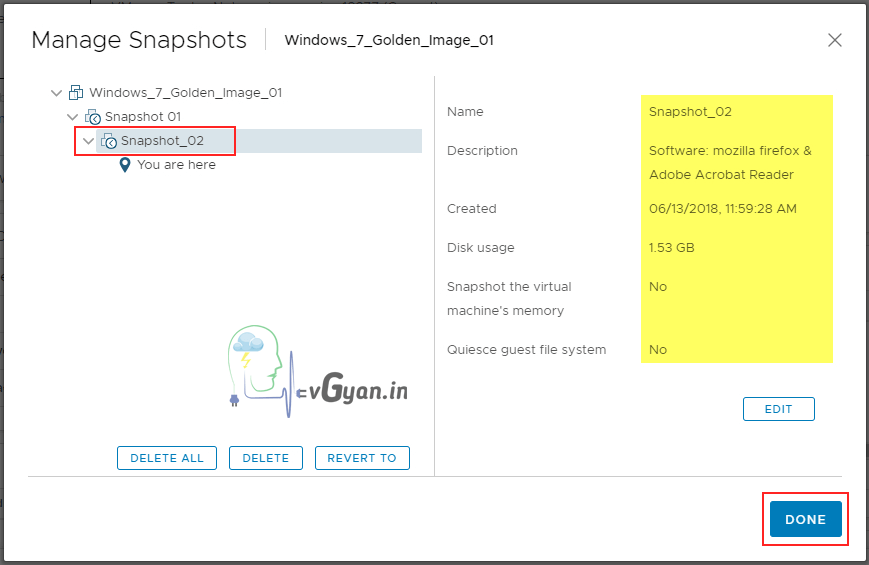
Verify we have both Snapshot_01 and Snapshot_02 on Windows_7_Golden_Image_01.
Below screenshot shows VDIUSER01 still in connected state. I initiated VDIUSER01 log off from desktop.

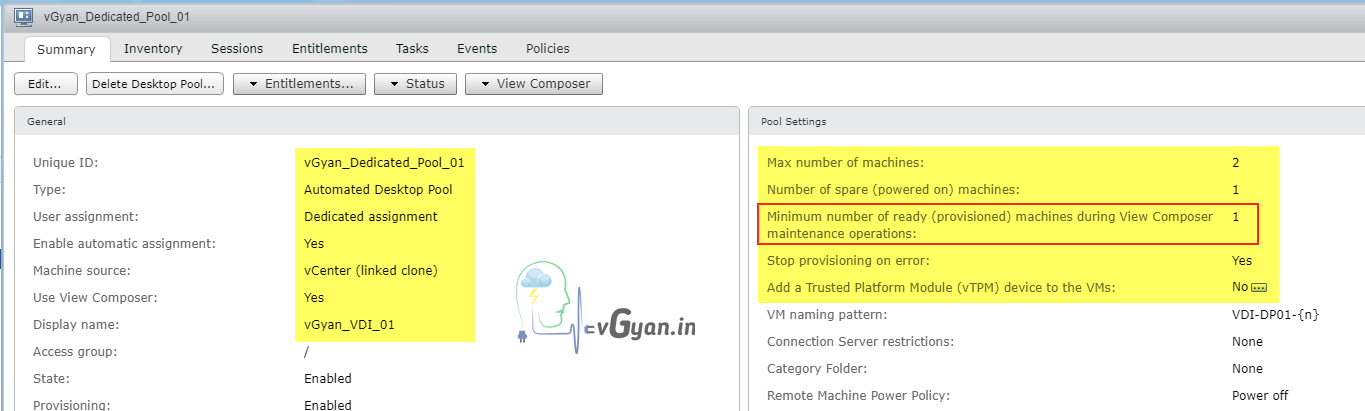
Verify “Minimum number of ready (provisioned) machines during View Composer maintenance operations: 1 (this will very according to your desktop pool configuration)
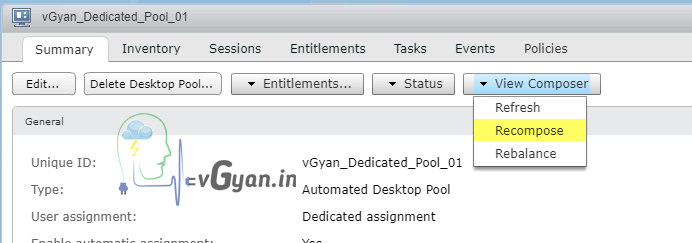
Select Desktop Pool > Summary > View Composer > Click on Recompose.
If you need to change base image (Golden Image), select change option.
We are going to perform recompose with same base image and different snapshot.
Select “Snapshot_02” and enable “Change default image for new machines” option.
click Next.
Note:- Change default image for new machines – If you are increasing desktop machine count, new machines will be created from this snapshot.

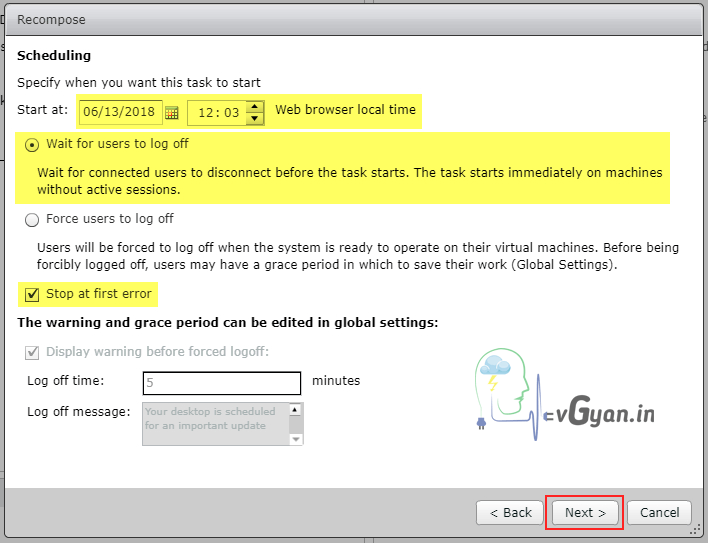
Recompose scheduling is another important thing, If you have a change window you can start recompose operation accordingly.
Always recommended option is “Wait for users to log off“, in some critical troubleshooting situation we may prefer “Force users to log off”
Select “Stop at first error” and click Next.
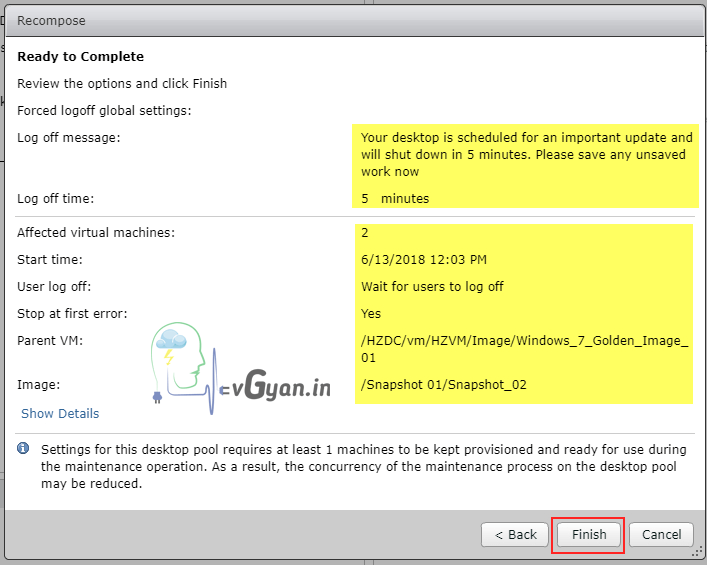
Verify and click Finish.
Verify pending recompose task under desktop pool “Tasks” tab.

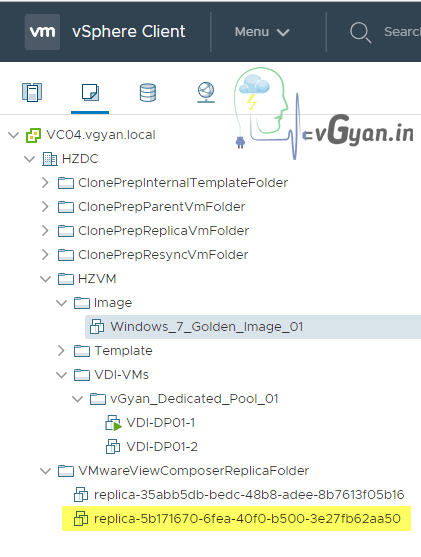
Inside vCenter we can find second replica copy which is created from second snapshot.
Verify task status from Tasks tab, we have one more VM recompose pending.

Under inventory tab we can find one VM customizing after recompose and another VM pending for recompose task.

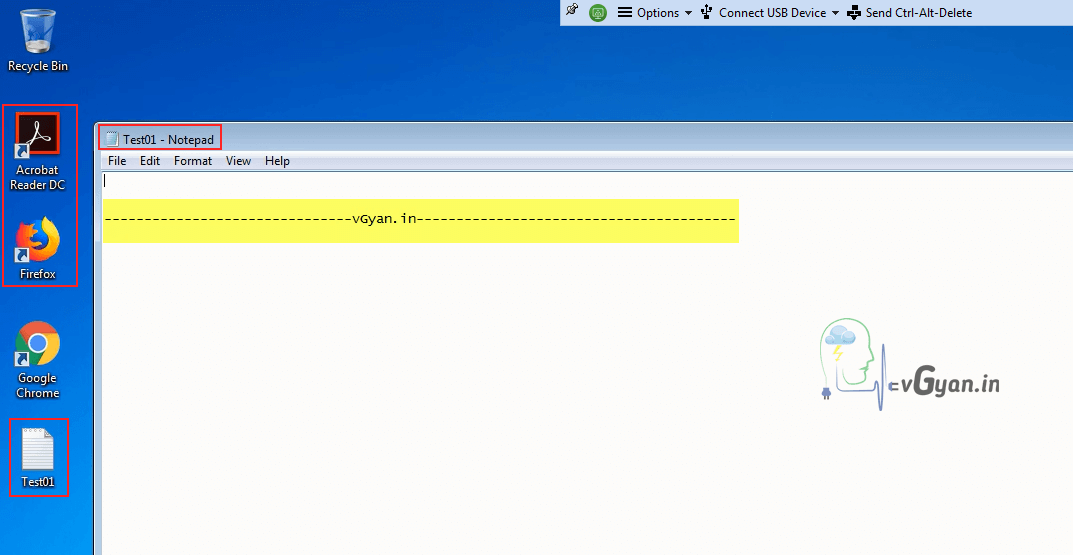
Recompose completed and VDIUSER01 able to see newly installed software’s and Test01 file on his desktop.
We can see desktop pool image changed to Snapshot_02.

So we successfully Recomposed Linked Clone desktop pool.
That’s all guys.. will discuss more on Horizon View 7.5 in upcoming post, Horizon View components installation and configuration, various Desktop pool creations, Application publishing etc… stay tuned.. 
Next blog post will be “Delete Linked Clone Virtual Machines Manually”
I hope you enjoyed reading this post. Feel free to share this to others if it is worth sharing!!!


