Replace SSL certificate on View Security Server
Hi all,
Today we will discuss about how to Replace SSL certificate on a View Security Server, When I deployed horizon view security server (SS01) it taken long time to fix certificated related issues. In my environment I am useing Microsoft Certificate Authority (CA). I divided certificate replacement into few parts,
- HTTPS Binding for CertSrv Website
- Duplicate Certificate Template for Horizon View
- Make Newly Created Certificate Template for Use
- Certificate Enrollment for Security Server SS01
- Download CA Certificate Chain
- Request and Download SSL Certificate for Security Server
- Export Newly Deployed SSL Certificate from Current User Personal Store
- Import Exported SSL Certificate to Local Computer Personal Store
- Rename Self signed certificate Friendly Name
- Restart VMware Horizon View Security Gateway Component
Horizon View 7.5 blog series: “Horizon View 7.5”
Previous blog post: “Deploy View Security Server”
Horizon View Security Server is part of work group so SSL certificate enrollment is little lengthy process, so this blog post is comparatively little lengthy because I didn’t remove any screenshots from the steps..
Let’s begin..
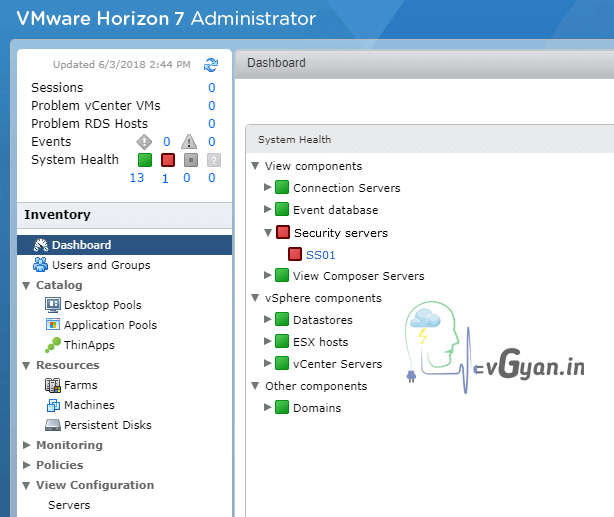
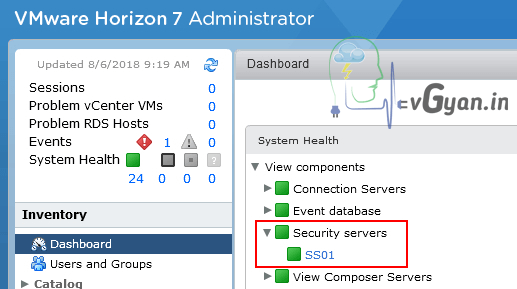
Currently my Security Server SS01 is not having any SSL certificate because of that we are getting RED alert on Dashboard.
Security server is not under domain so we need to use Active Directiry Certificate Service Web site (certsrv) for enrolling new SSL certificate.
Before proceeding, we need to make some changes in CA server.
HTTPS Binding for CertSrv Website
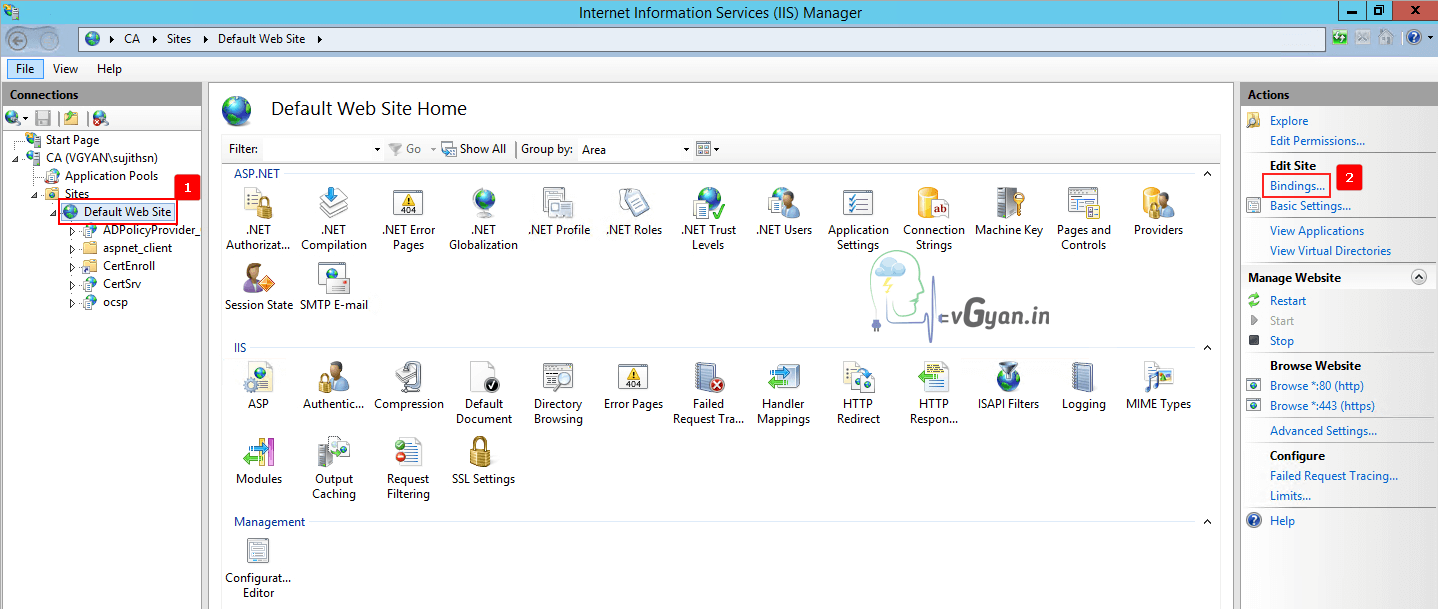
Login to CA server and launch IIS Manager, Select default website and click on Bindings option from right corner.
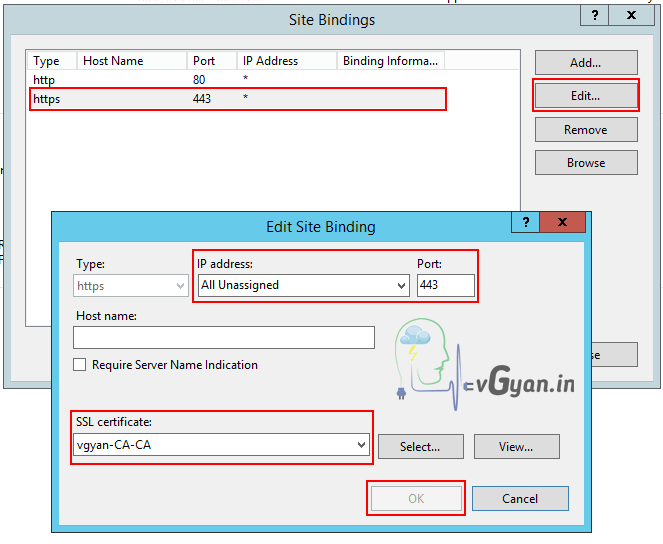
Under site bindings make sure you have https type with port 443, If you don’t have https type you can “Add” new one or if you have an existing one you can edit with SSL certificate to existing domain controller certificate.
This binding will allow us to connect CA website with https.
Duplicate Certificate Template for Horizon View
We will create a custom template for Horizon from default web server template.
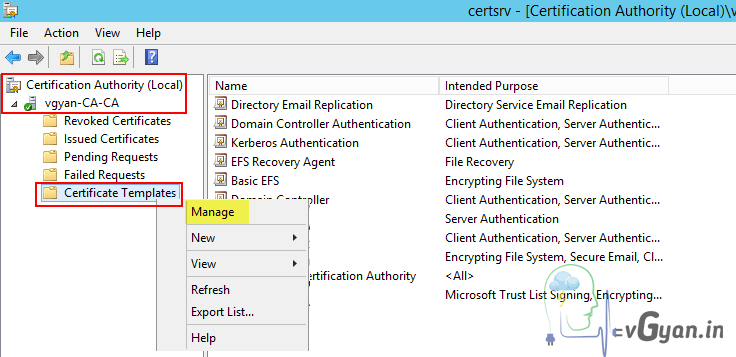
Open Certificate Authority (Local) on CA server and navigate it to “Certificate Templates“, Right click and select “Manage“.
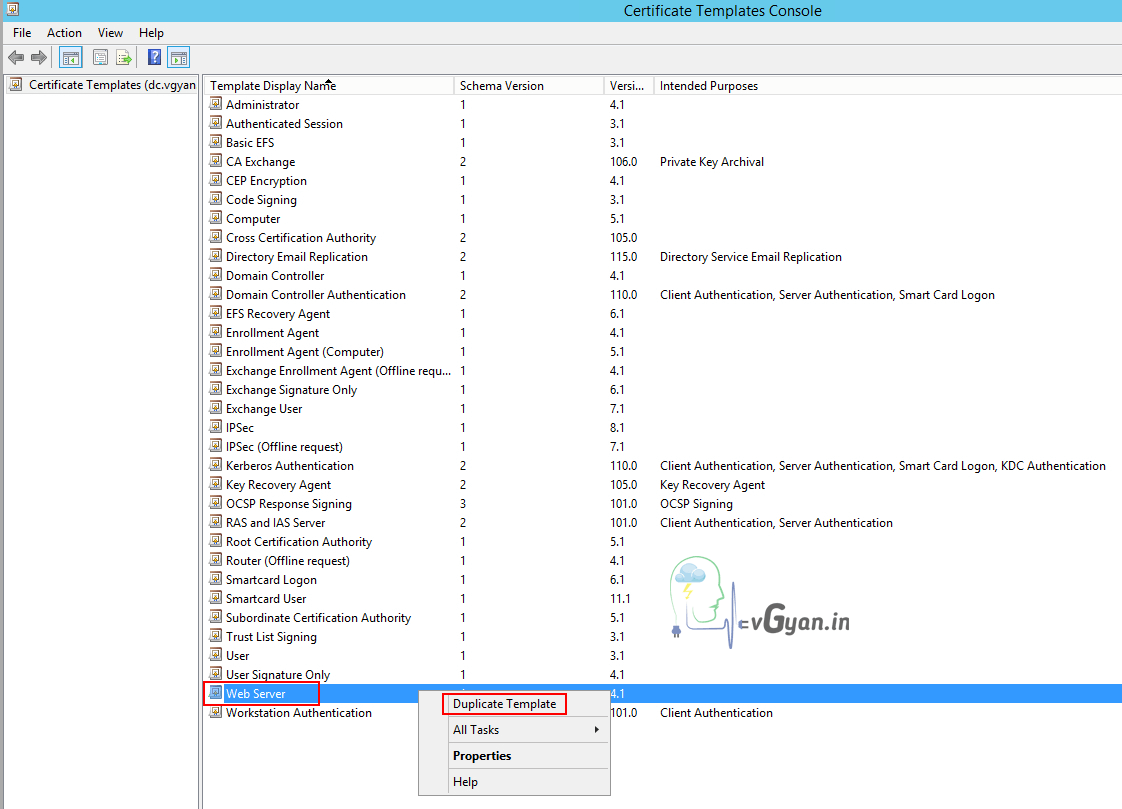
From Certificate Template Console,right click on “Web Server” template and select “Duplicate Template“option.
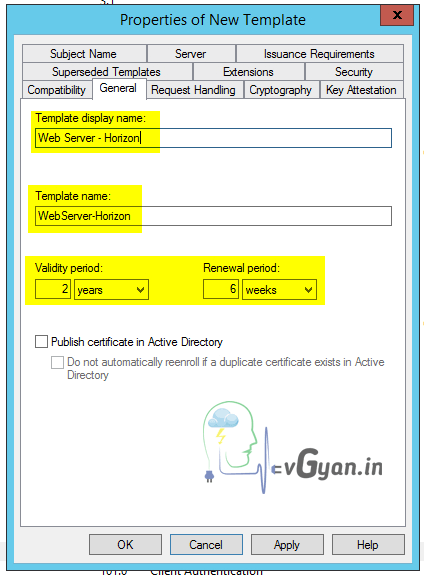
We need to make some changes on new template, Under “General” tab change template display name to “Web Server – Horizon“, verify validity period and renew period.
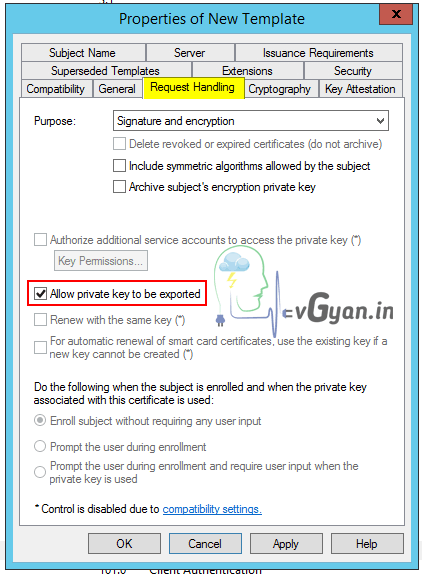
Under “Request Handling” tab Select “Allow private key to be exported” check mark. This will allow us to export private kay with certificate.
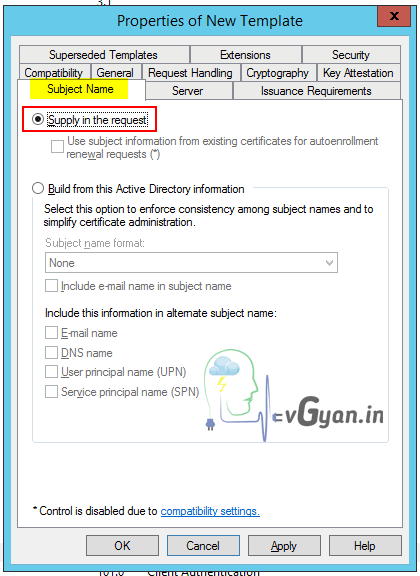
Under “Subjected Name” tab, make sure “Supply in the request” is selected.
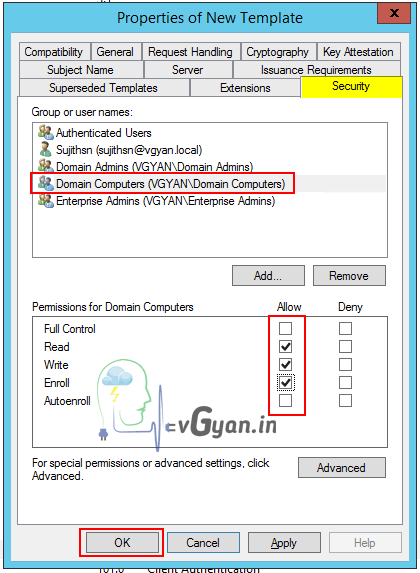
Finally under “Security” tab add “Domain Computers” and provide Read,Write, Enroll permission.
Verify customization and click OK.
Make Newly Created Certificate Template for Use
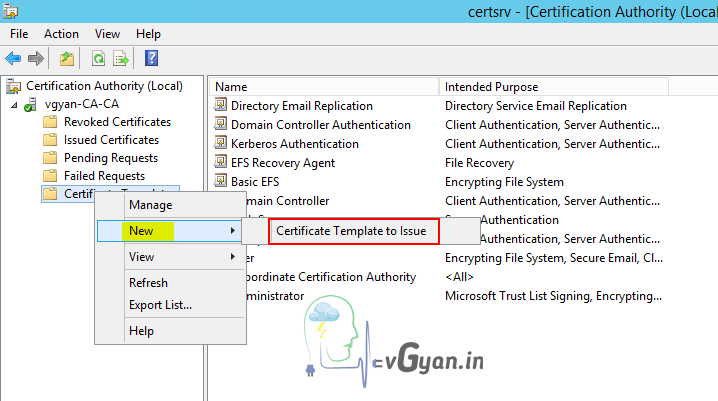
Open Certificate Authority (Local) on CA server and navigate it to “Certificate Templates“, Right click and select “New” and select “Certificate Template to Issue“.
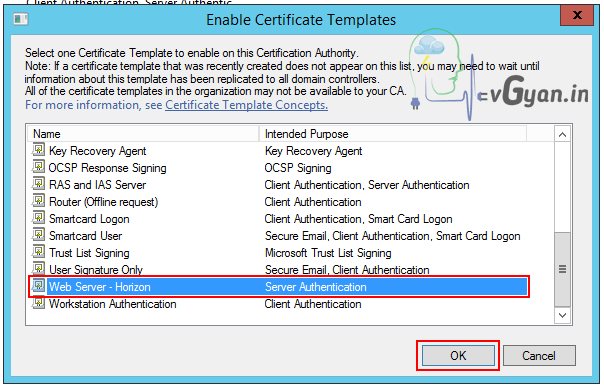
Select “Web Server – Horizon” template and click OK.
Newly created certificate template “Web Server – Horizon” is listed under “Certificate Templates”
Certificate Enrollment for Security Server SS01
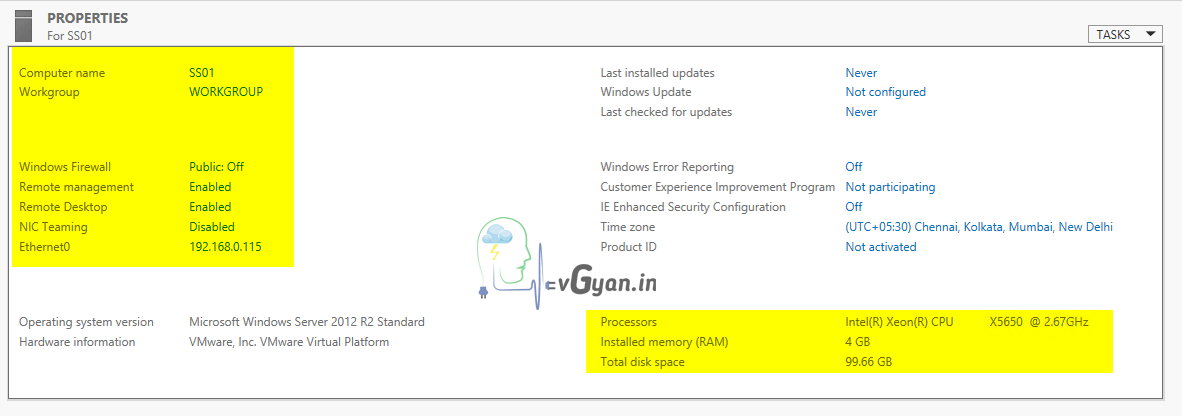
Below screenshot shows my security server property’s. “SS01” under “WORKGROUP“.
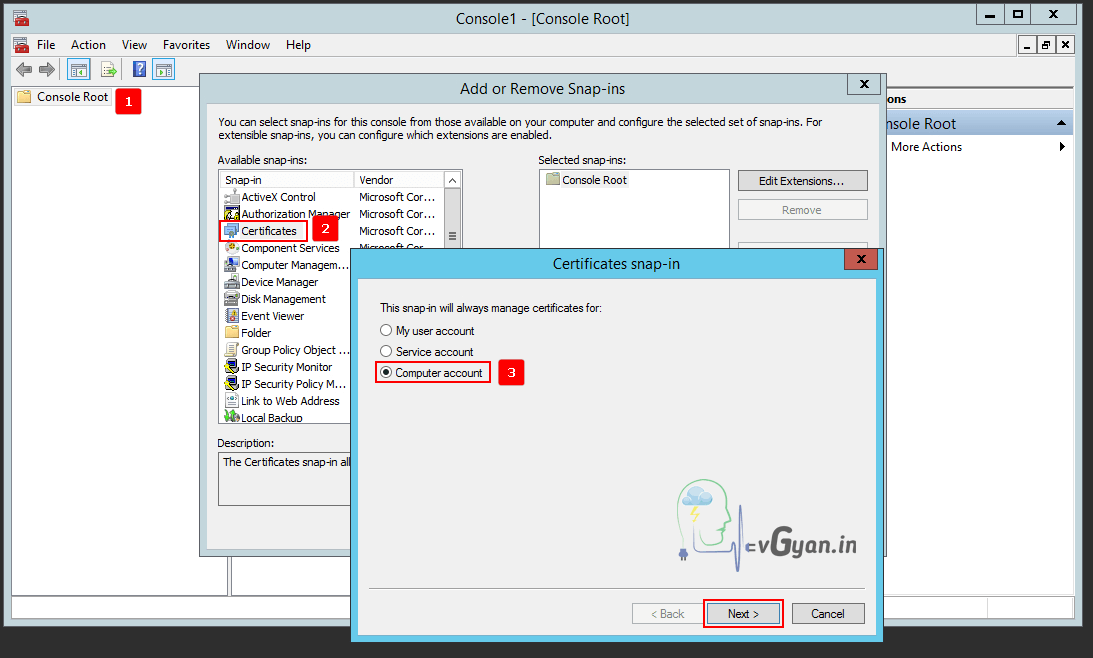
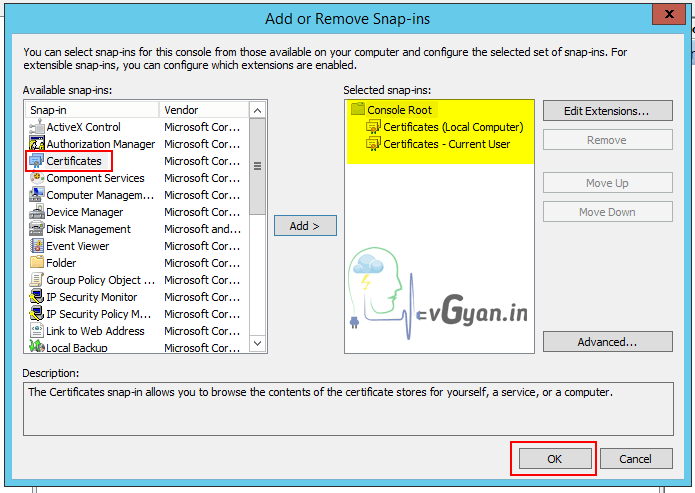
Open MMC console and add “Certificate” Snap-in, we have to add both Computer account and My user account snap-in.
Both Local computer and Current user sanp-in are added to MMC console.
Under console root select Certificate (Local Computer), Select Personal store and navigate it to Certificates. Verify “SS01” self signed certificate with “vdm” as friendly name.
Download CA Certificate Chain
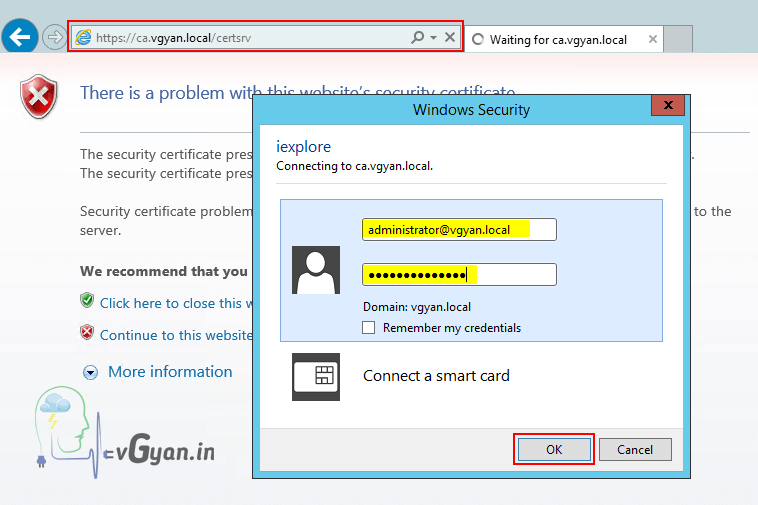
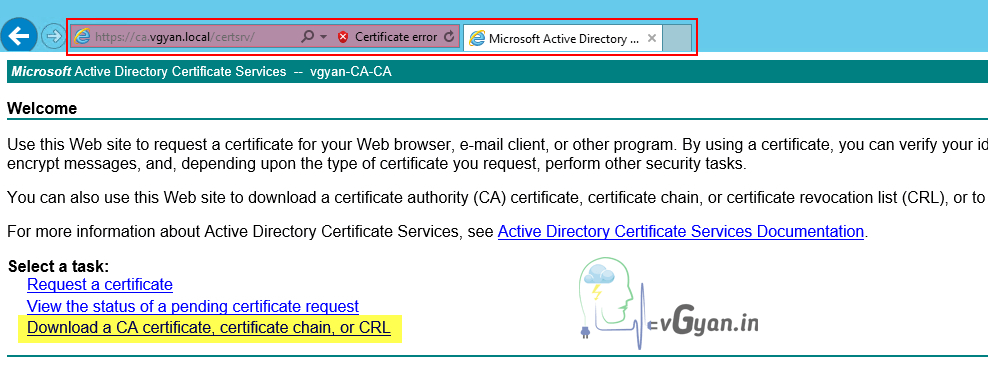
Open Internet explorer and access Certificate Authority “certsrv” web portal, url will be https://FQDN or IP/certsrv.
Login with Active Directory credentials and click OK.
Once “certsrv” portal opens, click on “Download a CA certificate,certificate chain, or CRL” option.
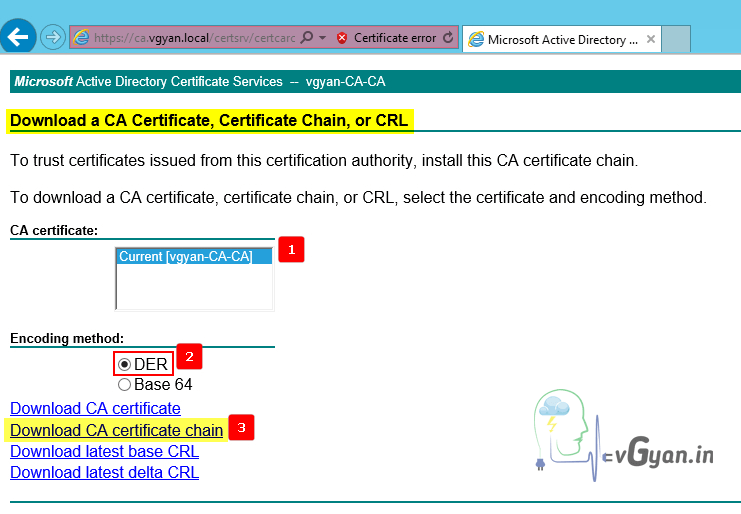
Select CA certificate “vgyan-CA-CA”, Encoding method “DER” and click on “Download CA certificate chain”
Note:-DER (Distinguished Encoding Rules)
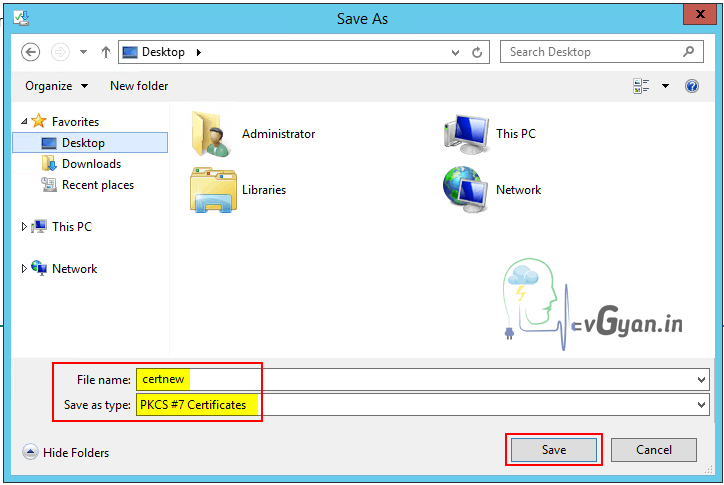
Save downloaded root certificate to any available location.
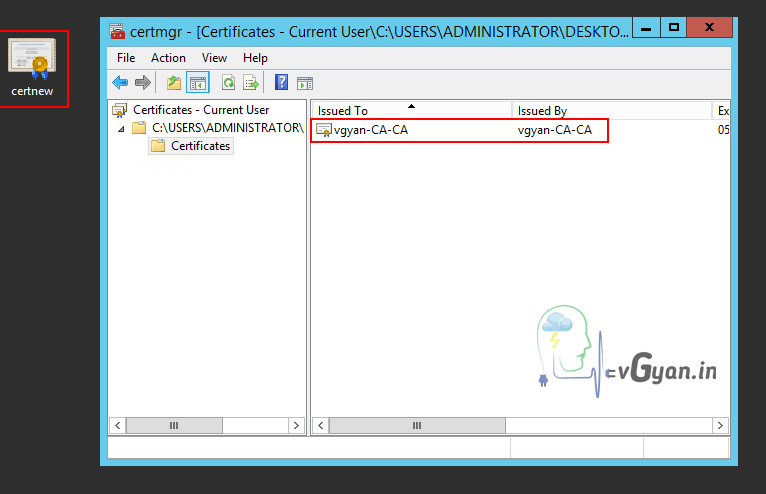
Open downloaded root certificate and verify.
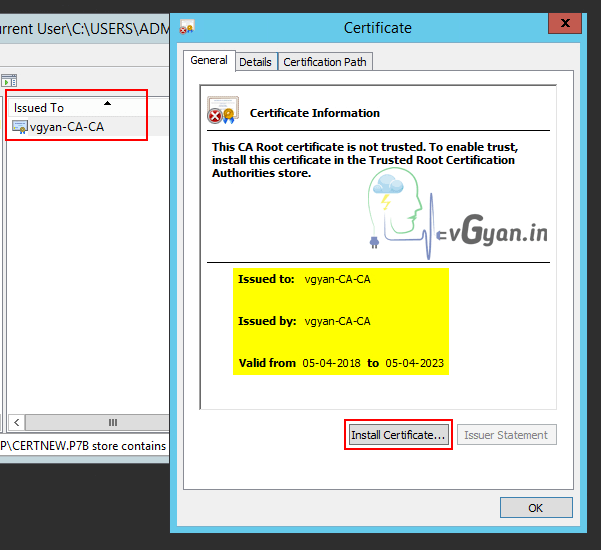
Double click on root certificate, once the certificate is open click on “Install Certificate”
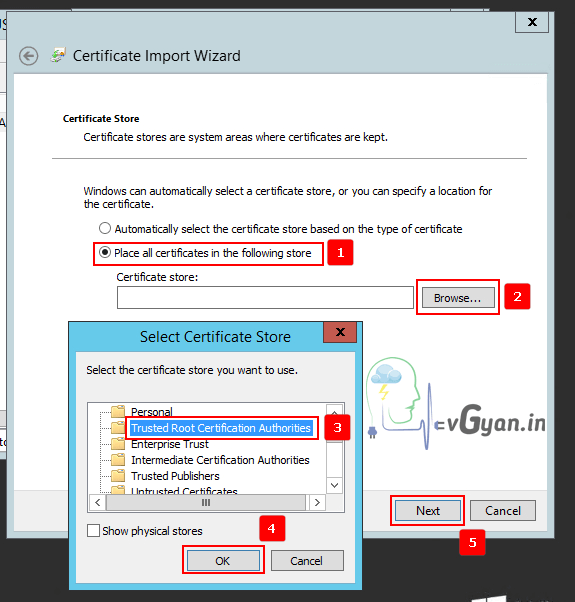
Select store location as “Local Machine” and click Next.
Select “Trusted Root Certification Authorities” as certificate store and click Next.
Click “Finish” to complete root certificate import.
Request and Download SSL Certificate for Security Server
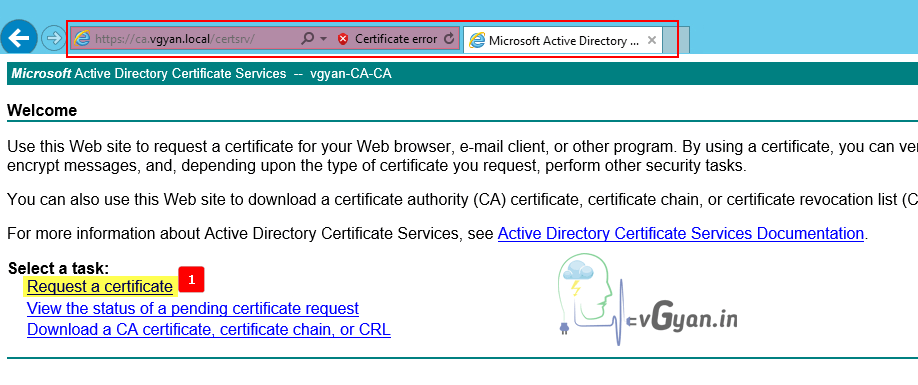
Once again re-login to “certsrv” web portal, under welcome page Select “Request a Certificate” task.
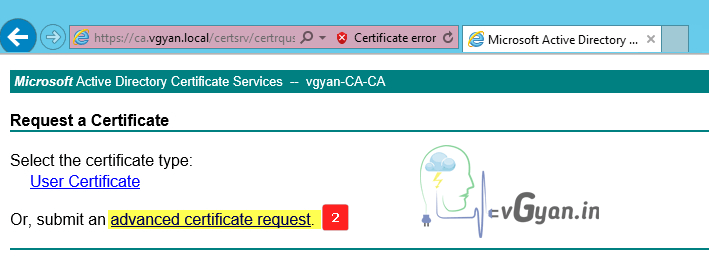
Under request a certificate page, select “advanced certificate request”
Under advance certificate request, Select “Create and submit a request to this CA“.
Once the advanced certificate request form opens, provide below details:-
- Select certificate template: “Web Server – Horizon” which we created.
- Provide name: ss01.vgyan.local (FQDN, Server not under domain its DNS entry)
- Mark keys as exportable.
- Hash algorithm: sha1
- Friendly name: vdm
Rest all values will be default, click on “Submit”
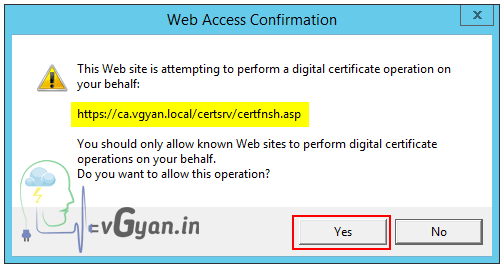
For web access confirmation window, Click “Yes”
Once certificate issued from CA Server, Click on “Install this certificate“.
Its a silent certificate installation, “certificate has been successfully installed” on SS01 server.
Newly installed certificate will be under, Console Root > Certificates – Current User > Personal > Certificate Store.
Verify newly installed SSL certificate is available in certificate store.
Export Newly Deployed SSL Certificate from Current User Personal Store
Newly deployed SSL certificate is under “Certificate – Current User” store we need to export and import this SSL certificate to “Certificate – Local Computer” store.
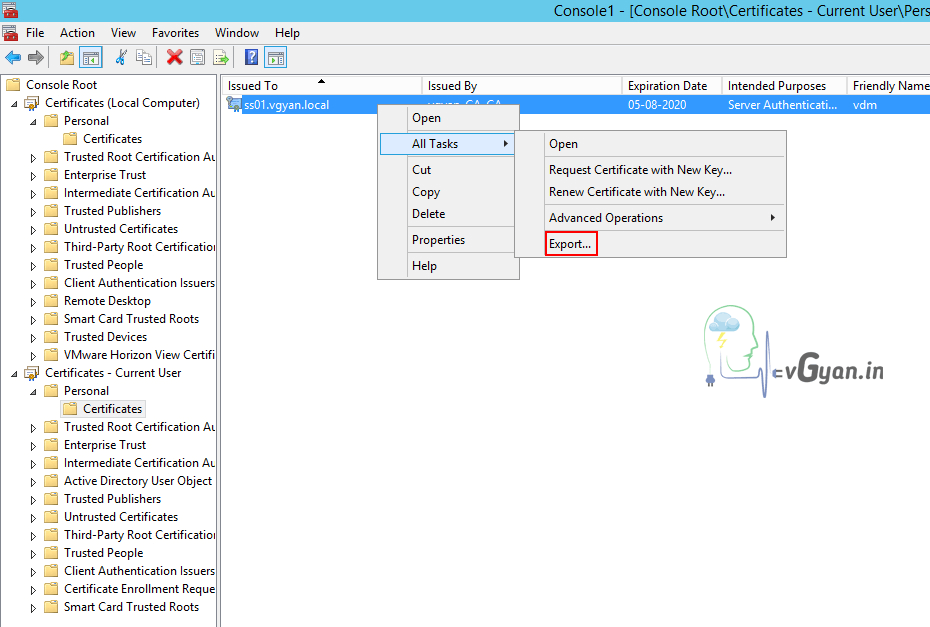
Right click on “certificate” > All task > select “Export”
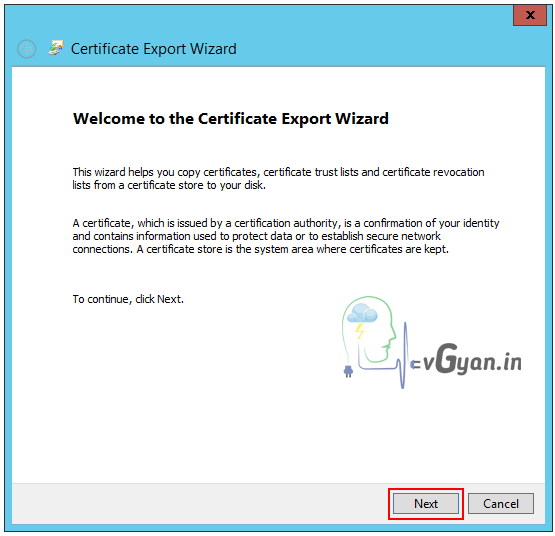
Click Next on Certificate export wizard.
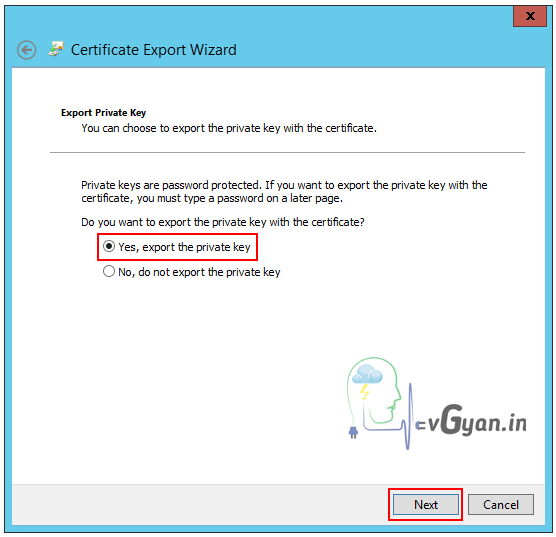
Select “Yes, export the private key” option and click Next.
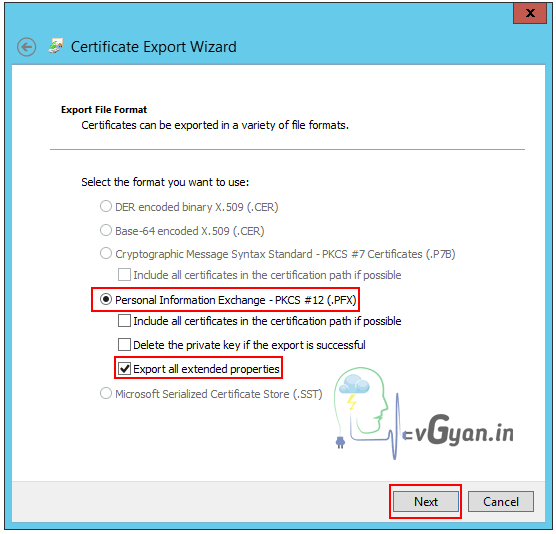
Under “Personal Information Exchange – PKCS #12 (.PFX)“, Select “Export all extended properties”
Click Next.
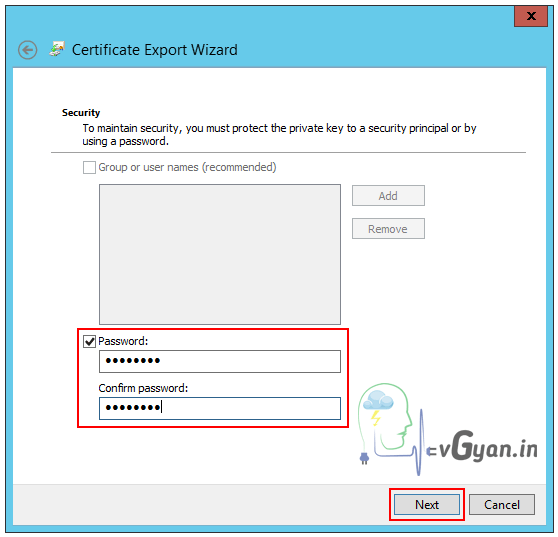
Provide Security password and click Next.
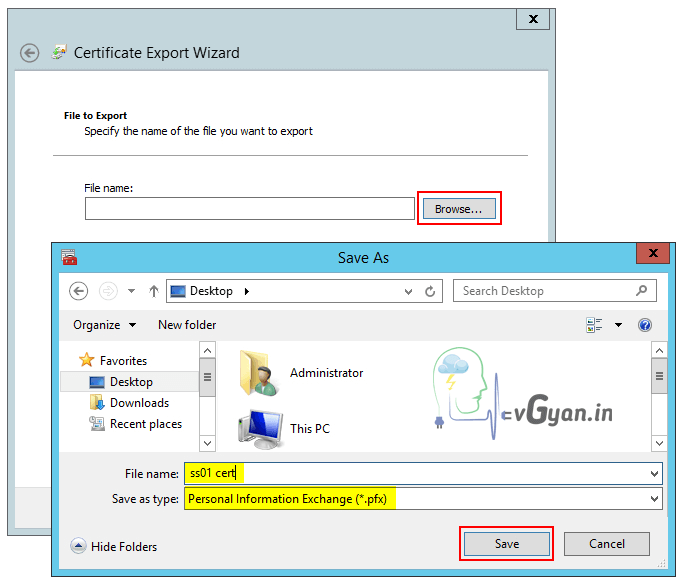
Browse and select a location for saving exported certificate, save SSL with any friendly name.
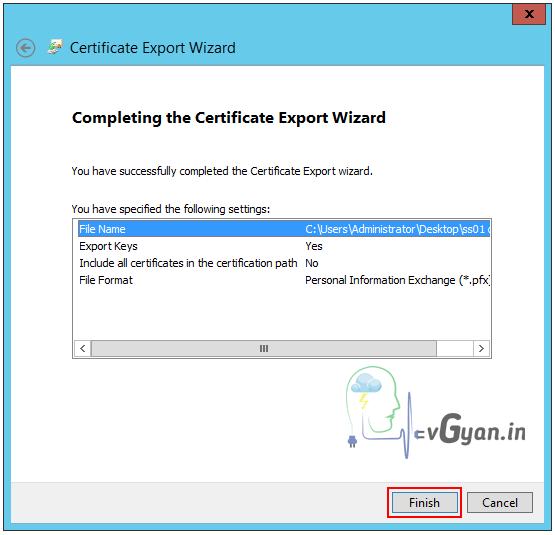
Click “Finish” to complete the certificate export.
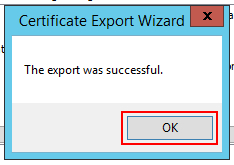
Make sure certificate exported successful, Click OK.
Import Exported SSL Certificate to Local Computer Personal Store
Now we successfully exported SSL certificate from “Current User Personal Store” to SS01 desktop.
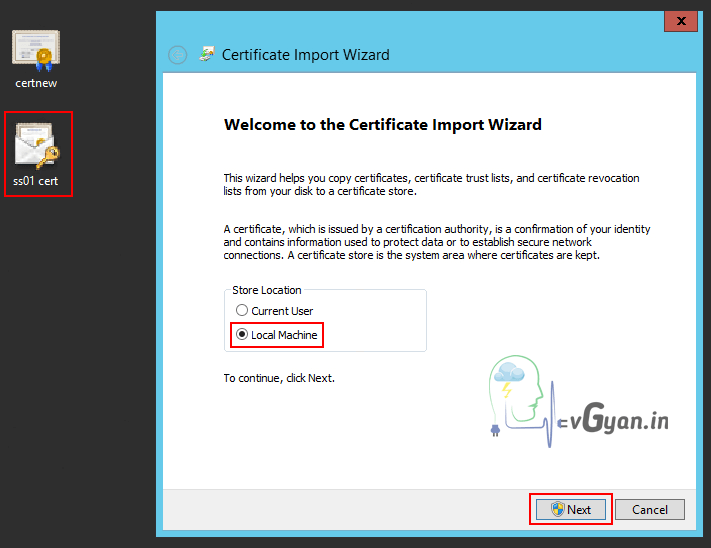
For Importing certificate, double click on “ss01 cert“, on “Certificate Import Wizard” select “Local Machine“.
Click Next.
Make sure you are importing right certificate and click Next.
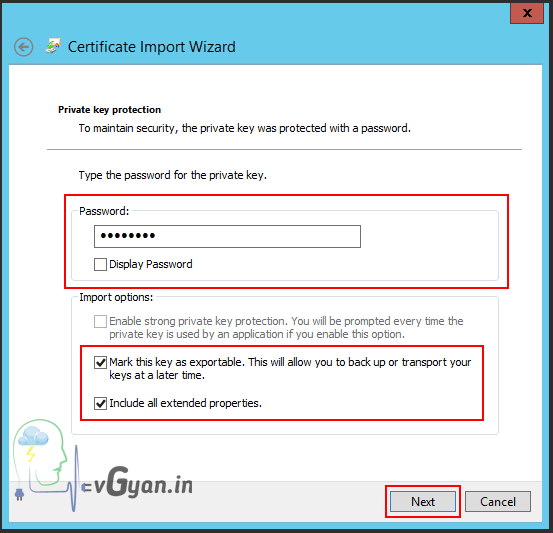
Provide private key protection password and select,
- Mark this key as exportable. This will allow you to back up or transfer keys at a later time.
- Include all extended properties.
Click Next.
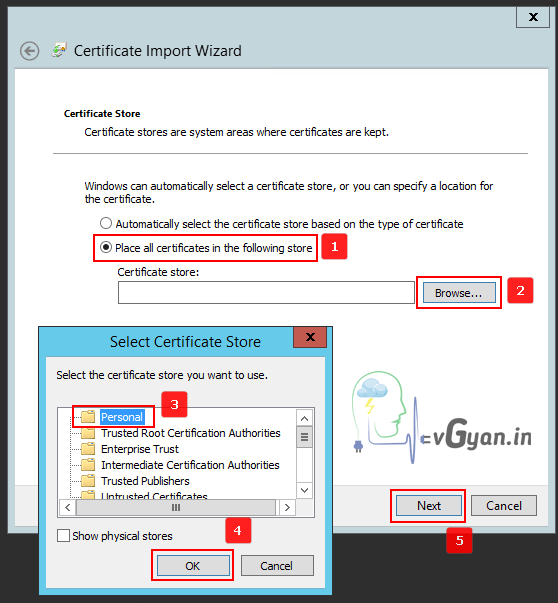
Select “Place all certificates in the following store“, click on “Browse” and select “Personal” certificate store.
Click Next.
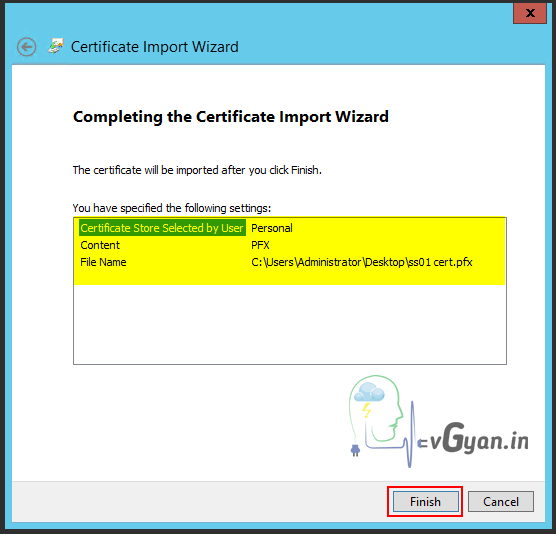
Click on “Finish” to complete certificate import.
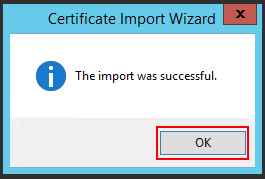
Make sure you are successfully imported SSL certificate.
Rename Self signed certificate Friendly Name
Now in personal certificate store we have two certificates, both are having “vdm” as friendly name.
Right click on self signed certificate and select certificate “properties”, Under “General” tab change friendly name to “OLD” and click OK.
Restart VMware Horizon View Security Gateway Component
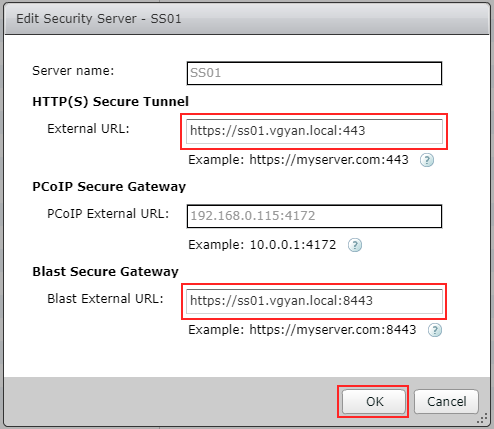
New SSL certificate is created with “ss01.vgyan.local” as name so I changed my security server external URL to FQDN, because some times it will show external URL validation error.
For editing Security Server, navigate to View Configuration > Servers > Security Servers > Select security server > Edit.
Click OK.
After certificate replacement we have to restart “VMware Horizon View Security Gateway Component” Service.
After service reboot, Security Server cleared SSL certificate error.
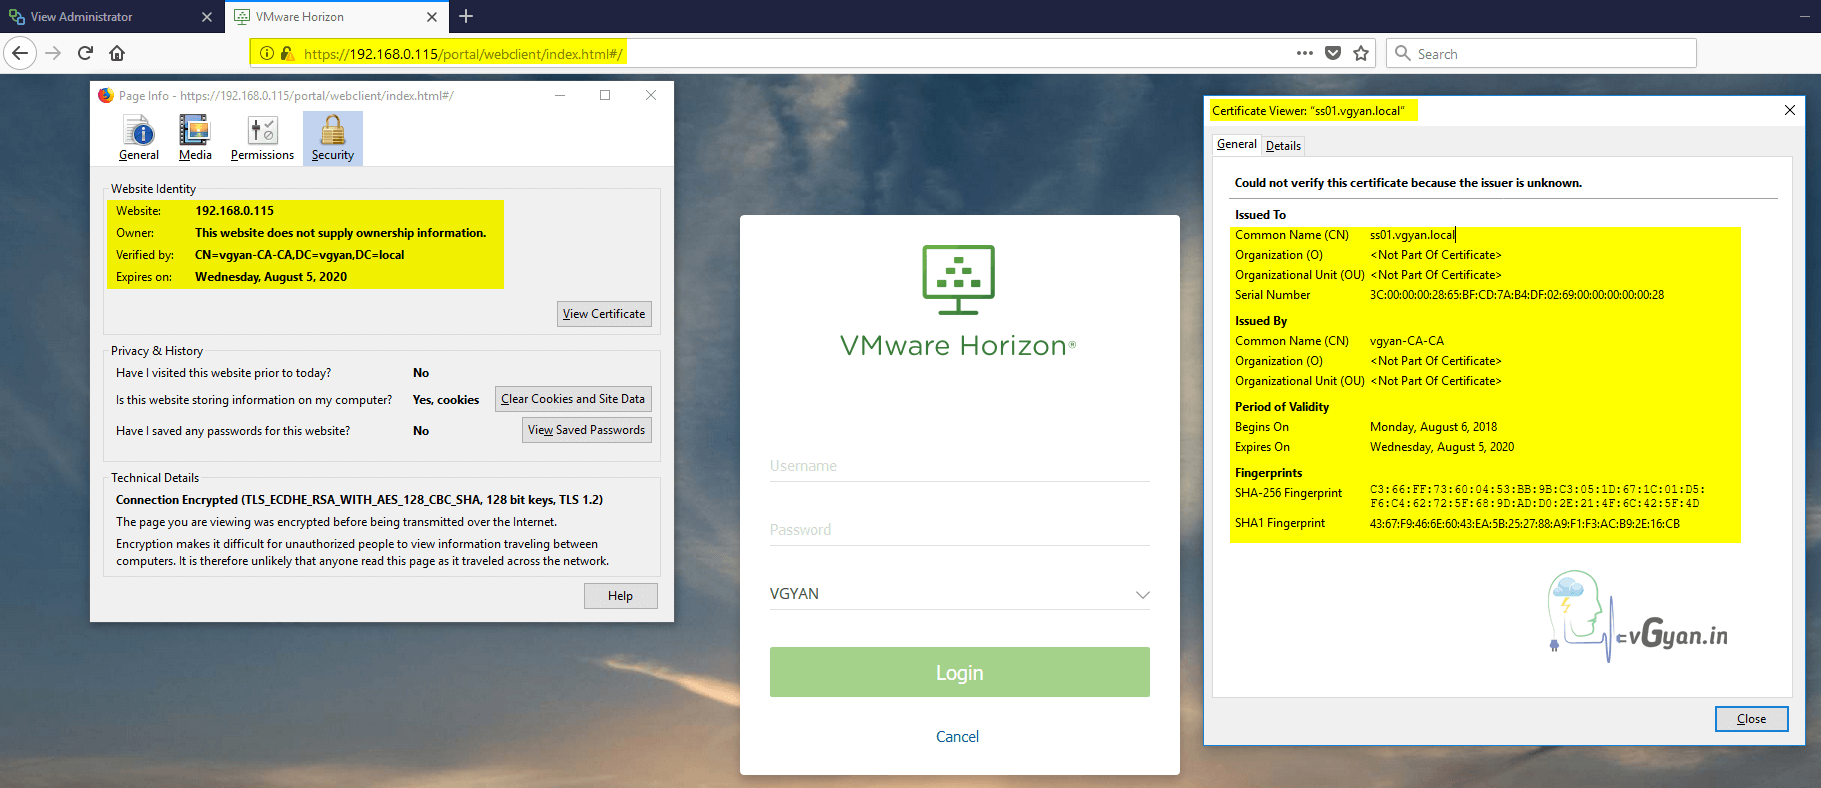
We can verify certificate properties while accessing security server form supported browser.
So we successfully Replaced SSL Certificate on View Security Server.
That’s all guys.. will discuss more on Horizon View 7.5 in upcoming post, Horizon View components installation and configuration, various Desktop pool creations, Application publishing etc… stay tuned..
Next blog post will be “Deploy View Enrollment Server”
I hope you enjoyed reading this post. Feel free to share this to others if it is worth sharing!!!
